 Welcome
to my Web site!
Welcome
to my Web site!
I am Dave Ackmann from Florissant Missouri, USA. I am a Model Railroader and member
of the Gateway Division of the National Model Railroad Association. I teach clinics on a variety of Model Railroading
topics, primarily in the area of modeling technology. Below are links to the clinics I have presented since 2019,
and you are invited to take a look. Many of these clinics have appeared virtually on the NMRAx web site, and I also conduct
them for NMRA Divisions upon request, at no charge. If you have any questions, or would like to host me as a clinician for your NMRA
Division, just
click here to send me an email. Thanks for visiting!
Dave Ackmann
Gateway Division, NMRA
Automating CAD for Model Railroad Structures Using "Generators"
Generators - The Basic Concept
When it comes to modeling structures for your model railroad, many basic structures are made from common "primitive" items
like walls, roofing and windows. 3D printing makes
the creation of common structural objects easier and more precise than traditional, manual methods, but learning how to use Computer Aided Design software
to create custom designed structures can be really difficult. In this clinic Dave Ackmann presents
how he developed computer programs he calls "Generators" to design such objects (and many more), allowing him to specify
design parameters through a simple form and then automatically calculate a precise 3D model to his specifications, all without
having to devote hours upon hours learning to use a sophisticated CAD package; best of all, the programs are available for free.
Plus, you no longer need the manual dexterity of a video gamer to create many custom 3D structure models!
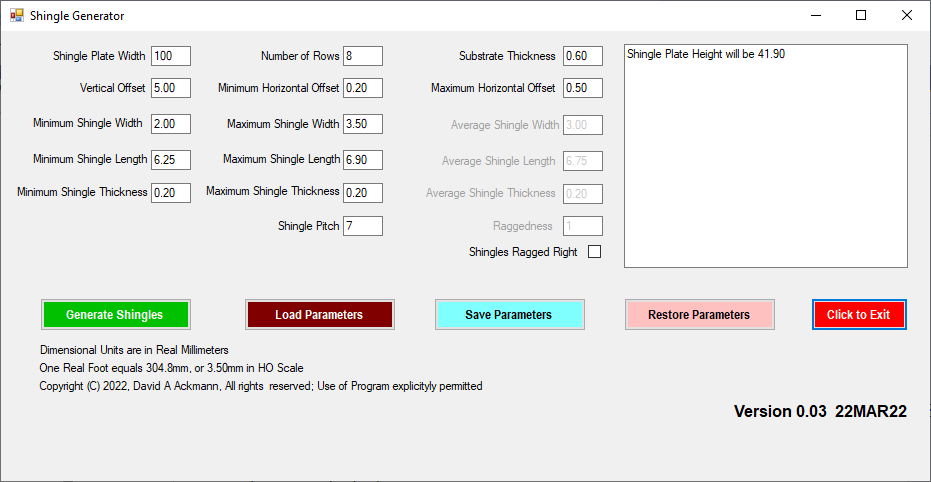
Normally at this point in the description of one of Dave's clinics you would have the opportunity to view a brief video "trailer" to introduce the clinic.
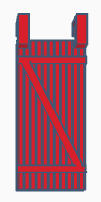
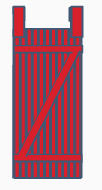
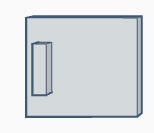
But for this particular clinic, it is better to first show you a screen shot of the user interface for one of the Generators, in this case
the Generator which creates shake shingles..
The user just enters design parameters such as height and width (and others as the user becomes more sophisticated),
and then presses the green button.
The Generator calculates a design file containing the appropriate 3D instructions
for the free "OpenSCAD" application. The user then launches OpenSCAD, imports the programming instructions created by the Generator into OpenSCAD.
and saves the file in Stereo Lithography (STL) file
format, suitable for direct 3D printing or to be used as the basis for
derivative designs.
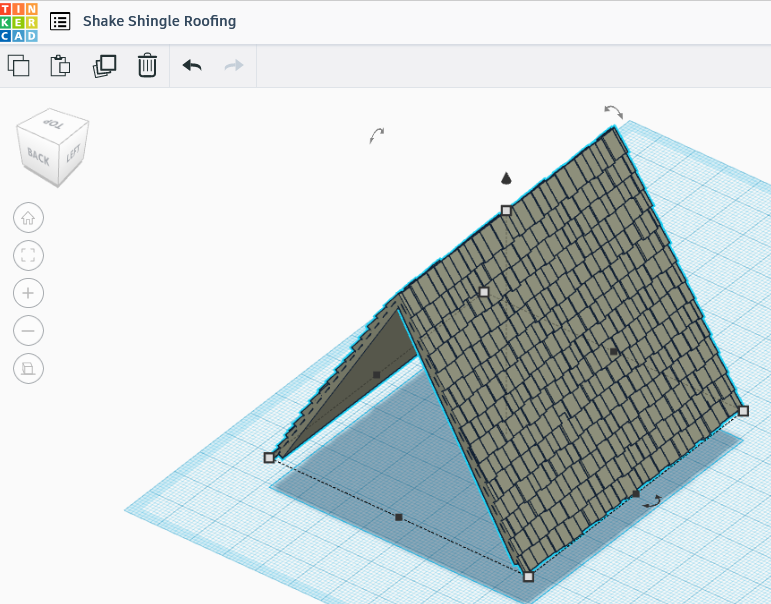
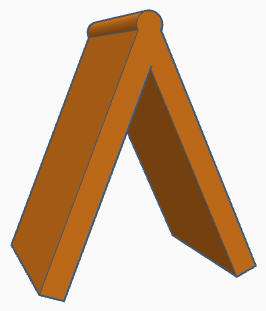
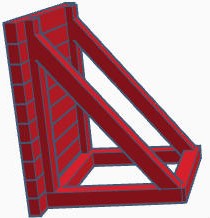
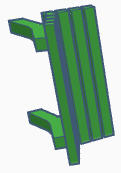
And here is a sample of the resulting model. Roofing panels are normally created individually and then
duplicated, reversed and joined with a second panel. Here we see a pair joined at
an angle representative of something that might be used for an A-Frame cottage.
Videos
Video "Trailer"
Now that you understand the basic concept, to view a short overview of this clinic, click here
Complete Clinic
To view the complete 30 minute clinic presented at the Gateway 2022 National Conference of the NMRA, click here
Second Section To discover new and enhanced Generators created since the initial release in the summer of 2022
click here .
After a 9 minute introduction to the concept of Generators, you will learn how to create barrel roofs, hip roofs, water tanks,
louvers, ladders, garage doors and many more useful objects. This clinic was first presented at the National Model Railroad Association conference
in Novi, Michigan, in July of 2025.
TinkerCAD Basics in 437 Seconds
Creating enhanced, derivative designs from Generator primitive items,
such as punching holes for windows and doors in a Basic Building, is really simple, and to learn how
I suggest the use of a free and very simple CAD package, TinkerCAD. By investing a bit over 7 minutes in this video, you will
quickly and painlessly (at least as painless as a COVID 19 injection) learn
the first 9 things you need to know to use any CAD software, in this case, TinkerCAD;
trust me, it is a skill set worth learning and well worth your time and attention.
To view this video,
click here
To View the Handout
click here.
For some unknown reason the text on the first page may not
appear in some browsers. If this is your case, just click on the DOWNLOAD button on the right
and the complete two page document will display.
New for December 2024
One by one, all Generators are being enhanced to include "Click On"
documentation of the function of each input field. If you wonder what a field does, just click on its name to the left
of the value box, and an explanation will appear in the "NOTES" area in the upper right of the input form. Sometimes the NOTES
will also contain brief hints and how to avoid common "GOTCHAs". So check to see when a Generator was last updated, and if it was updated after
01DEC24, give this new documentation feature a try.
Also new is a column in the table for "Tips & Tricks". Here you will find short videos about how I leverage Generators in TinkerCAD
to create interesting objects.
If something looks interesting, give the entry a Click! Not all Generators will have an entry,
but hopefully these brief videos will inspire you
to create objects you might not have thought you could do.
FINALLY, I am getting around to producing Tutorials on some of the most popular Generators. Each of these will be about 6 to 9 minutes
long, and explain what each field does. Creating tutorials is time consuming, and about one a month is my limit,
so the interval between new Generators.
and enhancements to older ones may increase. But it needs doing, so stay tuned; look for the first of
these. As of the beginning of April 2025, five tutorials and three tips are already online, and more are coming.
How To Download Generators
When you click here,
you can download a ZIP file that contains the current version of every Generator.
To complete the download, click on the "Download" button (
 ) toward the lower right of the next window.
When you do so, a .ZIP file will appear in your download folder; you can double-click on the archive
to open it and execute an individual file directly or extract the entire collection.
But be advised that the first time you try to run the program, Windows Virus Checker (Windows Defender) may flag the file as suspicious, and you may
not be able to run it unless you click "More Info" and "Run Anyway" For your own piece of mind,
I suggest you virus scan the file to convince yourself it is virus free. If you like what you see, extract the file from the ZIP Archive and
store it on your local hard drive. Enjoy!
) toward the lower right of the next window.
When you do so, a .ZIP file will appear in your download folder; you can double-click on the archive
to open it and execute an individual file directly or extract the entire collection.
But be advised that the first time you try to run the program, Windows Virus Checker (Windows Defender) may flag the file as suspicious, and you may
not be able to run it unless you click "More Info" and "Run Anyway" For your own piece of mind,
I suggest you virus scan the file to convince yourself it is virus free. If you like what you see, extract the file from the ZIP Archive and
store it on your local hard drive. Enjoy!
Complete List of Generators
| Topic |
Version |
Tutorial Link |
Tips & Tricks |
| Basic Buildings - Walls |
0.21 14AUG25 |
Concept and Process for
a basic four walled building
Watch this one first! |
|
| Roofing - Flat, Rafters and Pillars |
0.24 07JAN26 |
Flat Roofing
Rafters and Pillars Not Yet Available |
Aligning Roof Panels
Creating Hip Roofs
|
| Roofing - Shake Shingles |
0.15 14AUG25 |
Concept and Options |
|
| Roofing - Arched |
0.18 27MAR25 |
Concept and Options |
|
| Brick Walls |
0.13 03DEC24 |
Not Yet Available |
|
| Windows |
0.14 09JUN25 |
Coming Eventually |
|
| Awnings |
0.04 16OCT24 |
Not Yet Available |
|
| Spiral Staircase |
0.04 14JUN26 |
Not Yet Available |
|
| Garage Doors |
0.01 24JAN24 |
Not Yet Available |
|
| Billboard Supports |
0.14 17MAY26 |
Concept and Options |
Creating Slatted Billboards |
| Grids |
0.01 27MAY26 |
Not Yet Available |
|
| Water Tanks |
0.14 05JUL26 |
Concept and Options |
|
| Silos |
0.01 03DEC25 |
Not Yet Available |
|
| Ladders |
0.01 01SEP25 |
Concept and Options |
|
| Staircases/Handrails |
0.06 31JUL23 |
Not Yet Available |
|
| Floors and Decks |
0.04 26JUN23 |
Not Yet Available |
|
| Concrete Foundations |
0.05 26JUN23 |
Not Yet Available |
|
| Piers and Deck Supports |
0.07 21OCT24 |
Not Yet Available |
|
| Louvers and Shutters |
0.05 21AUG24 |
Not Yet Available |
|
| Trellis |
0.01 24FEB26 |
Not Yet Available |
|
| Construction Tools |
0.06 10JAN24 |
Not Yet Available |
|
| Storage Tubes |
Not Yet Available |
Not Yet Available |
|
| Trestle Bents |
0.07 03DEC24 |
Not Yet Available |
|
| River Rock |
0.01 29JAN25 |
Not Yet Available |
|
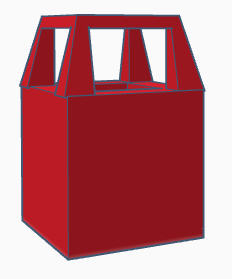
| Circus Tent |
0.01 13MAY25 |
Not Yet Available |
|
| Bleachers |
Not Yet Available |
Not Yet Available |
|
| Fences |
0.01 19MAR25 |
Not Yet Available |
|
| Gutters and Downspouts |
Not Yet Available |
Not Yet Available |
|
| Balconies |
Not Yet Available |
Not Yet Available |
|
Additional Models For Structures
Although not a part of the "Automating CAD" clinic, I would like to share some additional 3D object models
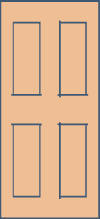
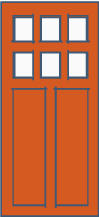
that might be useful to structure modelers. Let's start with doors, I found doors did not lend themselves to Generators,
and ended up drawing a few in TinkerCAD. The table below
shows thumbnails of the designs I have made. Just click on a design and a STL model file will be sent to your Downloads folder.
Please note that exterior doors in the US are often 36" wide and 80" tall, which translates into 10.5mm and 23.33mm in HO Scale
which is the size of the images you will download here;
if you are an N scale modeler, just multiply the HO dimensions by 0.544 to get the corresponding dimensions for your needs
Then came roof details and just a bunch of random items. If you find something you like, download it and have fun!.
|
Doors - Download As You See Fit
|
| Door Image |
Comments (Optional) |
Door Image |
Comments (Optional) |
Front301.STL
|
|
Solid000.STL
|
|
Solid002.STL
|
|
Solid001.STL
|
|
Front201.STL
|
|
Front401.STL
|
|
Front002V.STL
|
|

BarnLeft.STL
|
|
BarnRight.STL
|
|
BarnDutch.STL
|
|
Screen011.STL
|
|

Screen001.STL
|
|
Security100.STL
|
|
Front022.STL
|
|
Front332.STL
|
|
Sandwich Board.STL
|
I recommend printing on a side edge.
|
Roller Door Left.STL
|
Print horizontally, without supports. Delicately slide onto Roller Door Rail;
|
Roller Door Right.STL
|
Print horizontally, without supports. Delicately slide onto Roller Door Rail;
|
Roller Door Rail.STL
|
Embed this rail in a 2mm thick wall, at a height such that the doors will slide freely, depending on your foundation (approx 13mm).
|
|
Random Things - Download As You See Fit
|
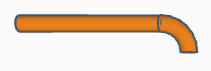
Gooseneck 90.STL
|
Note: These pipes are solid and not designed to be operational lights. |

Gooseneck 270.STL
|
Note: These pipes are solid and not designed to be operational lights. |

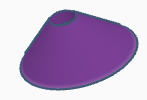
Gooseneck Shade 5.STL
|
These Gooseneck Shades have increasing size, so pick one that looks good to you. You may have to
drill out the center a bit to match the Gooseneck pipes. |

Gooseneck Shade 7.STL
|
These Gooseneck Shades have increasing size, so pick one that looks good to you. You may have to
drill out the center a bit to match the Gooseneck pipes. |
Gooseneck Shade 10.STL
|
These Gooseneck Shades have increasing size, so pick one that looks good to you. You may have to
drill out the center a bit to match the Gooseneck pipes.; |
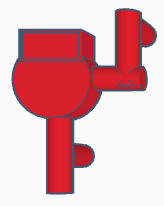
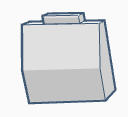
Gas Meter.STL
|
|
Ice Machine.STL
|
This machine looks great with custom decals on the bottom front and the sides of the machine; I'll leave that up to you. |
Ice Machine Door.STL
|
I made the door separately so that it could be painted easily to contrast with the machine (I use silver for the door.) |

FlatcarBlocker4.STL
|
Designed to prevent loads from shifting on flat cars. 4 feet deep. |
FlatcarBlocker8.STL
|
Designed to prevent loads from shifting on flat cars 8 feet deep. |
225 Vent.STL
|
|
Roof Access Shed.STL
|
|
Park Bench
|
For me, this model prints best standing on its end. |
Dentil Moulding.STL
The STL file has 25 segments, not 4, and is 109.88mm long. |
|
-->
Trash Can
|
Print on a 45 degree angle. |
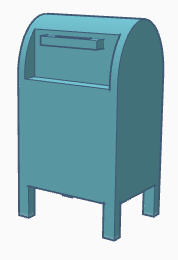
Mail Box
|
Print on a 45 degree angle |
Some Of My Better Models
.
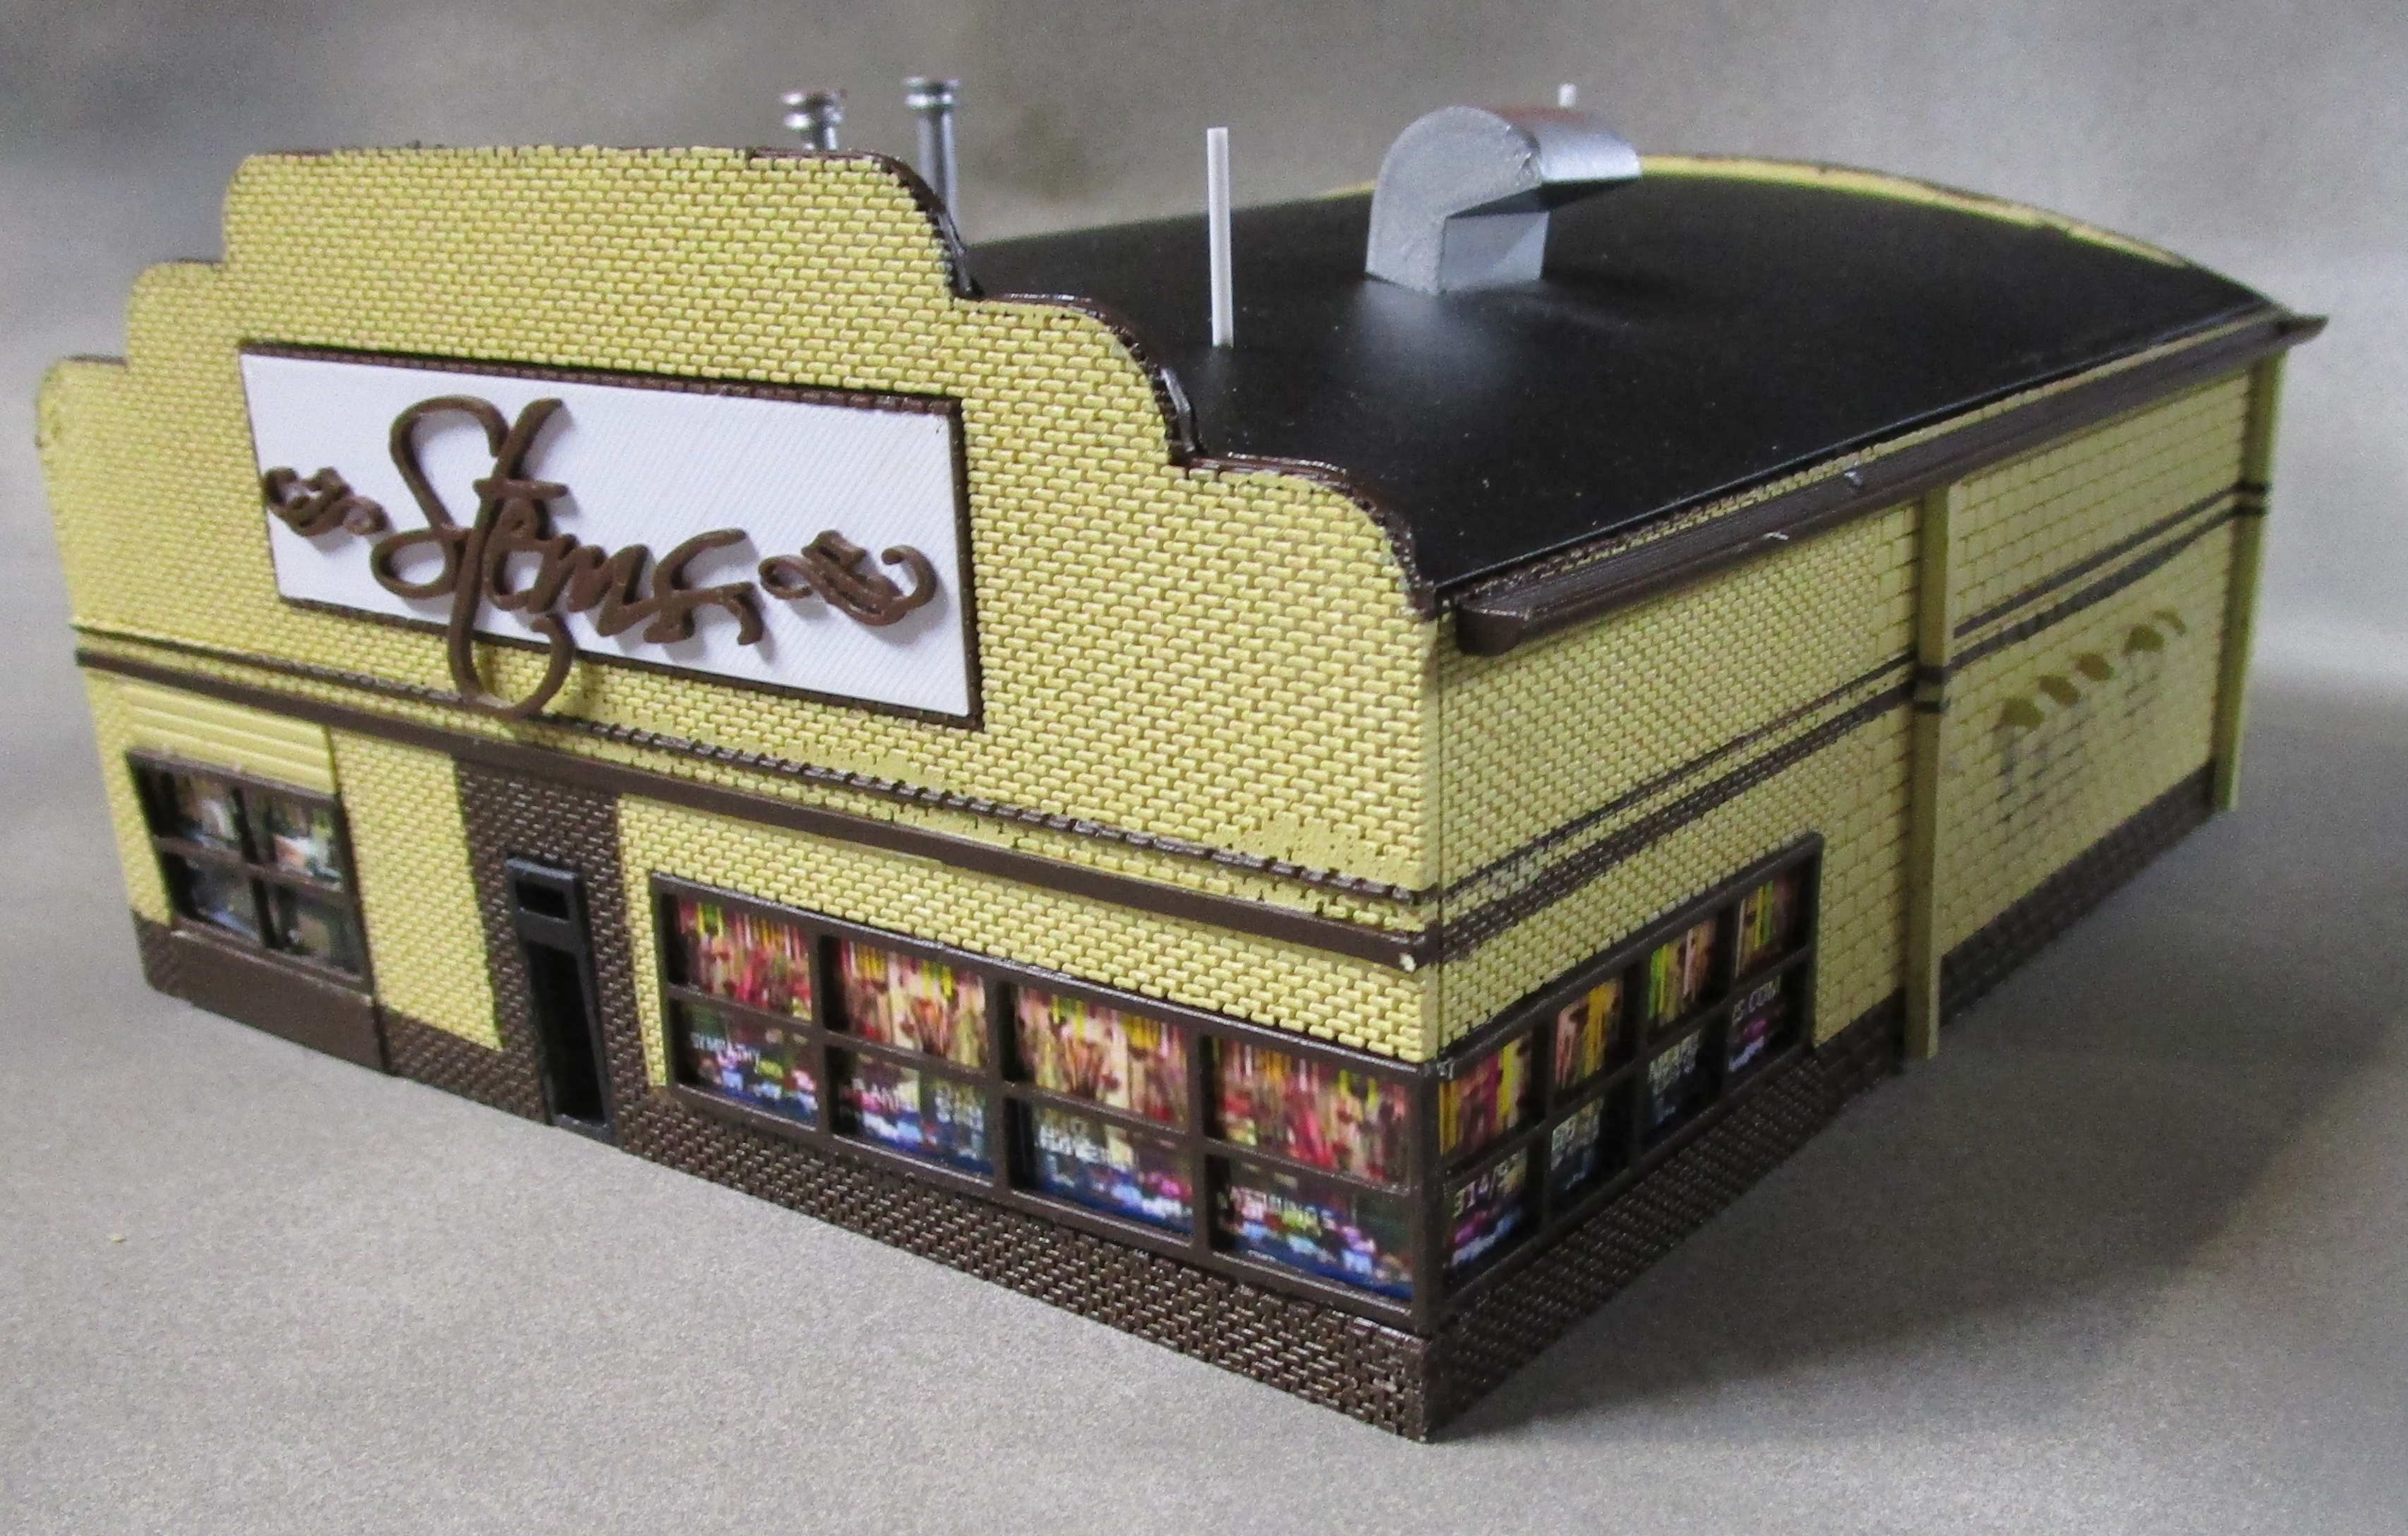
 Stems Florist - Located in Florissant MO, this building was built in 1940 and was previously a Sheltered Workshop
and Print Shop among other functions. It features extensive brick and construction block walls and arched roof.
My model was designed using custom software I wrote for the walls and roof, plus OpenSCAD and TinkerCAD. It was printed
on a Bambu P1S 3D printer and hand painted. This model took "Best In Show" at the November 2024 Meet of the
Gateway Division of the NMRA.
Stems Florist - Located in Florissant MO, this building was built in 1940 and was previously a Sheltered Workshop
and Print Shop among other functions. It features extensive brick and construction block walls and arched roof.
My model was designed using custom software I wrote for the walls and roof, plus OpenSCAD and TinkerCAD. It was printed
on a Bambu P1S 3D printer and hand painted. This model took "Best In Show" at the November 2024 Meet of the
Gateway Division of the NMRA.
;
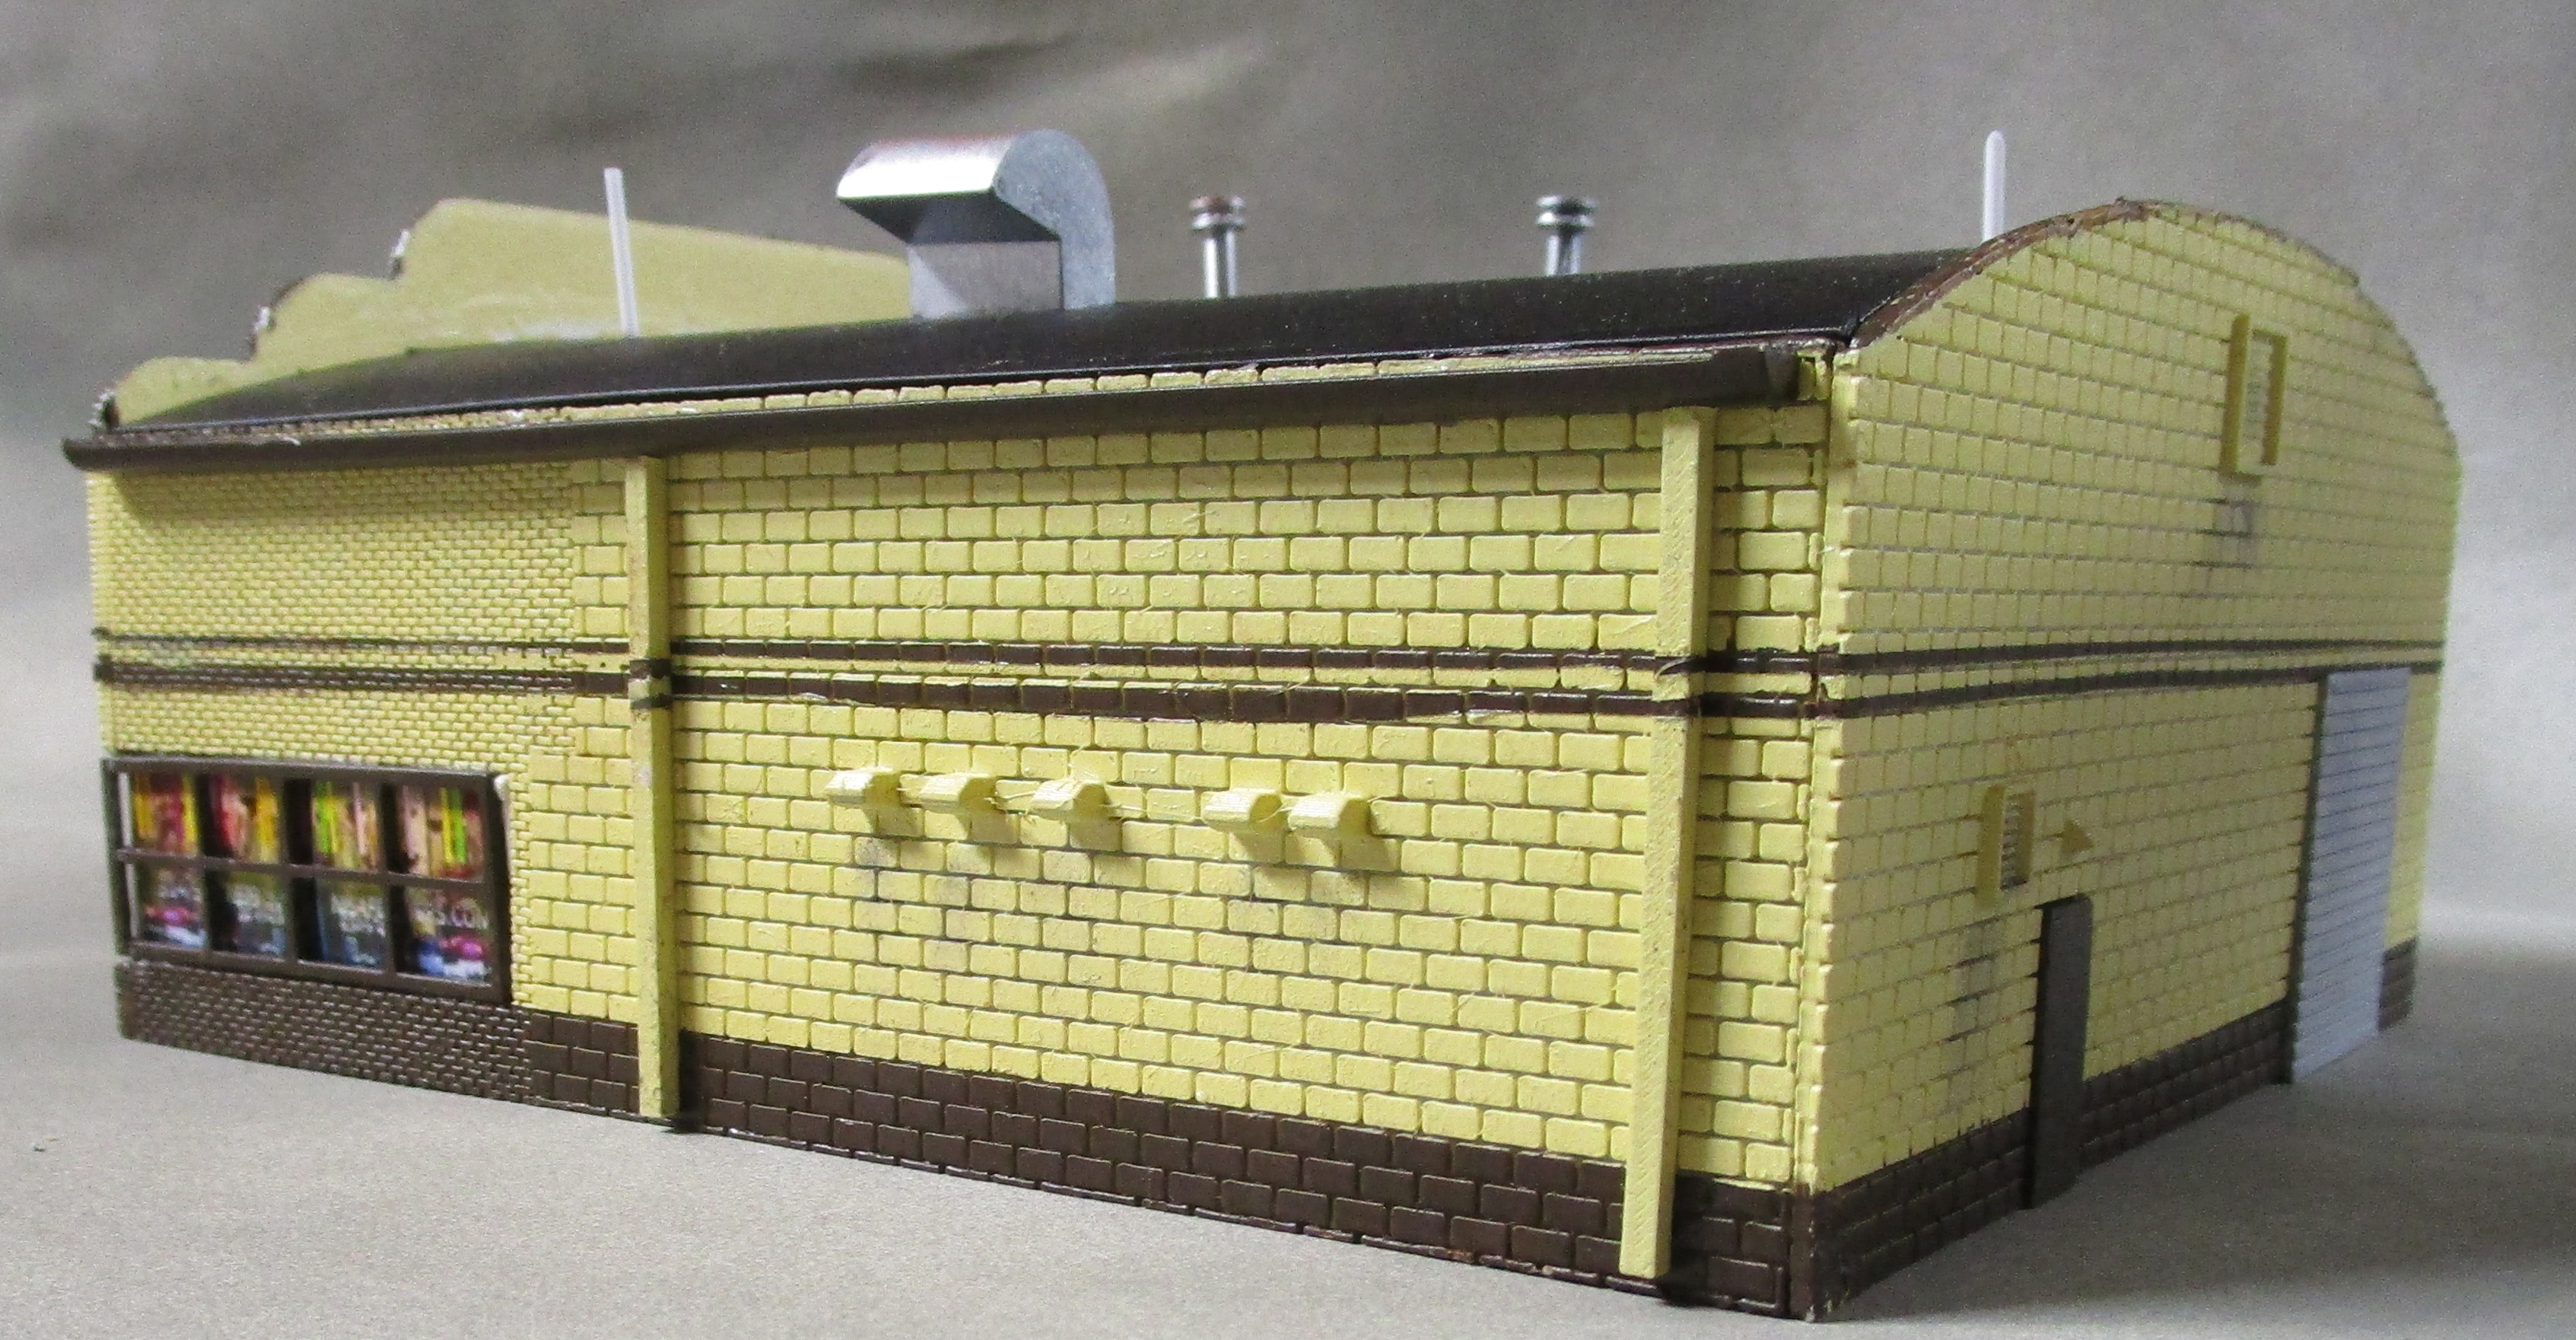
 Abandoned Church's Chicken - Located on Parker Spur Road in Florissant MO, this building was abandoned
in the Spring of 2024. Although it was boarded up, it was still quite clean and lacking in grafitti. I liked it because of the many wall
contours and roof detail. I designed most of it in TinkerCAD and printed it on my Bambu P1S. It was then hand painted.
The boarded windows were printed in wood-impregnated PLA filament. This model received a Merit Award at the November 2024 Meet of the
Gateway Division of the NMRA.
Abandoned Church's Chicken - Located on Parker Spur Road in Florissant MO, this building was abandoned
in the Spring of 2024. Although it was boarded up, it was still quite clean and lacking in grafitti. I liked it because of the many wall
contours and roof detail. I designed most of it in TinkerCAD and printed it on my Bambu P1S. It was then hand painted.
The boarded windows were printed in wood-impregnated PLA filament. This model received a Merit Award at the November 2024 Meet of the
Gateway Division of the NMRA.
.
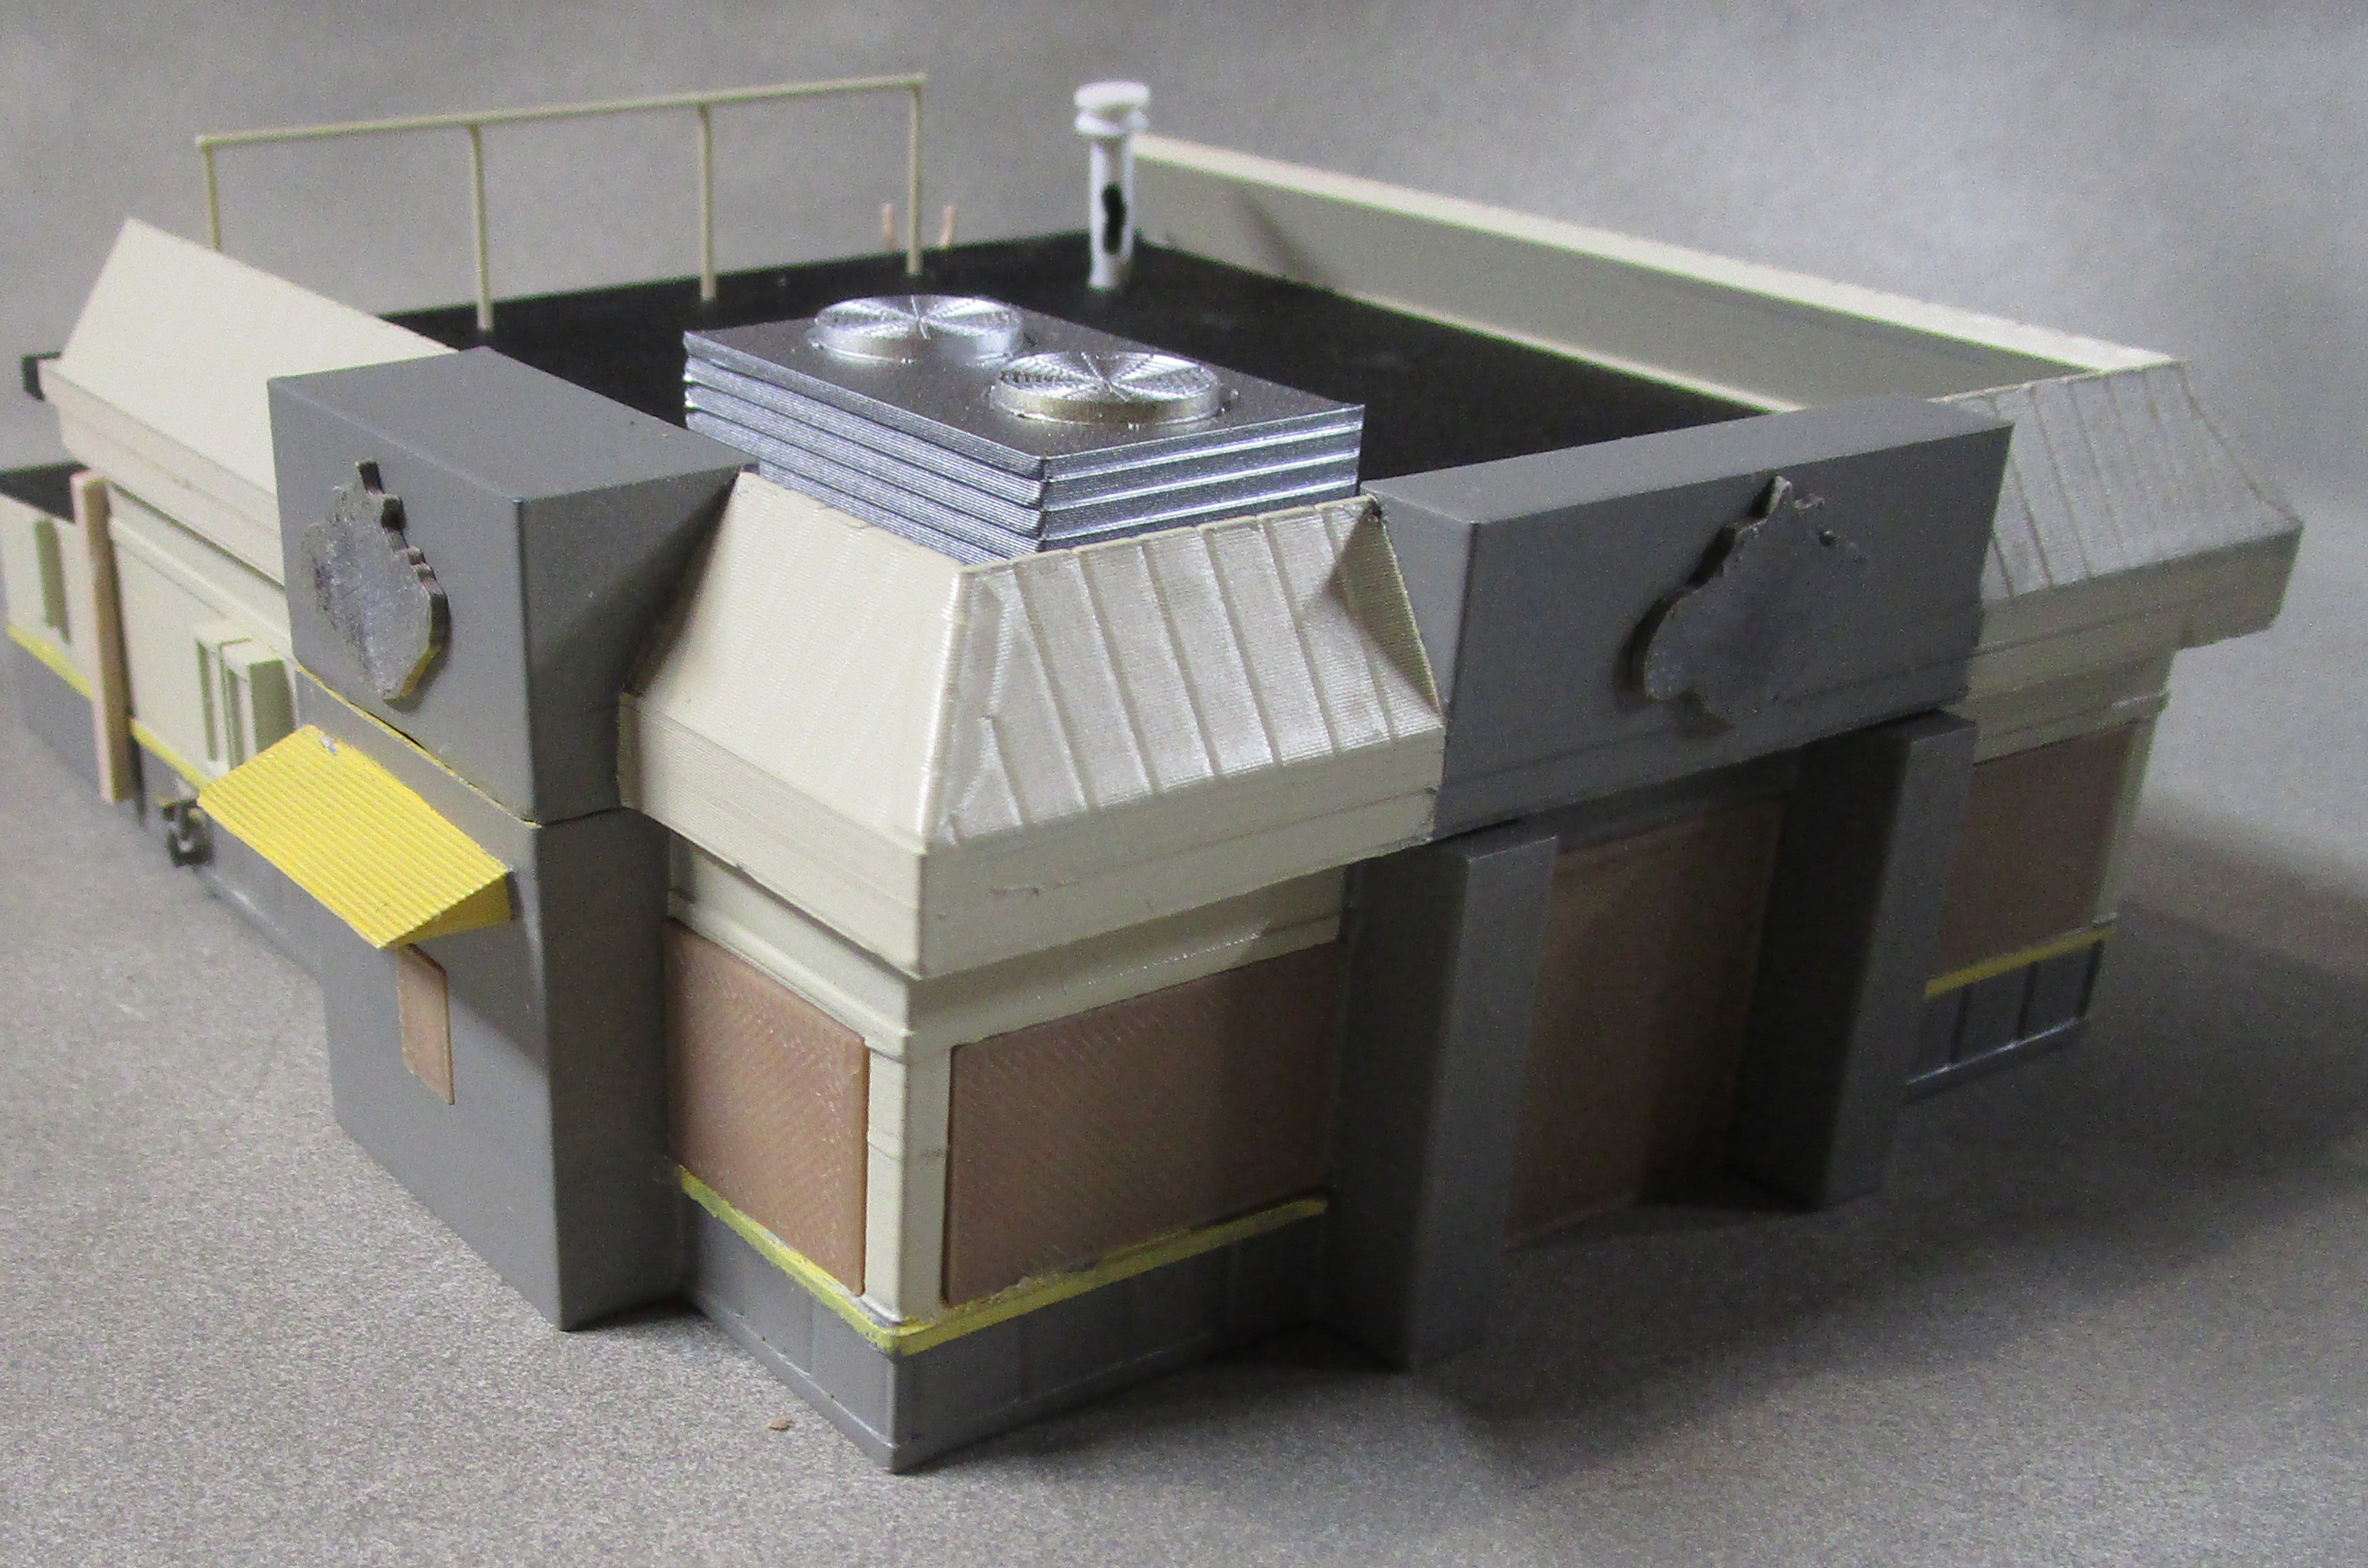
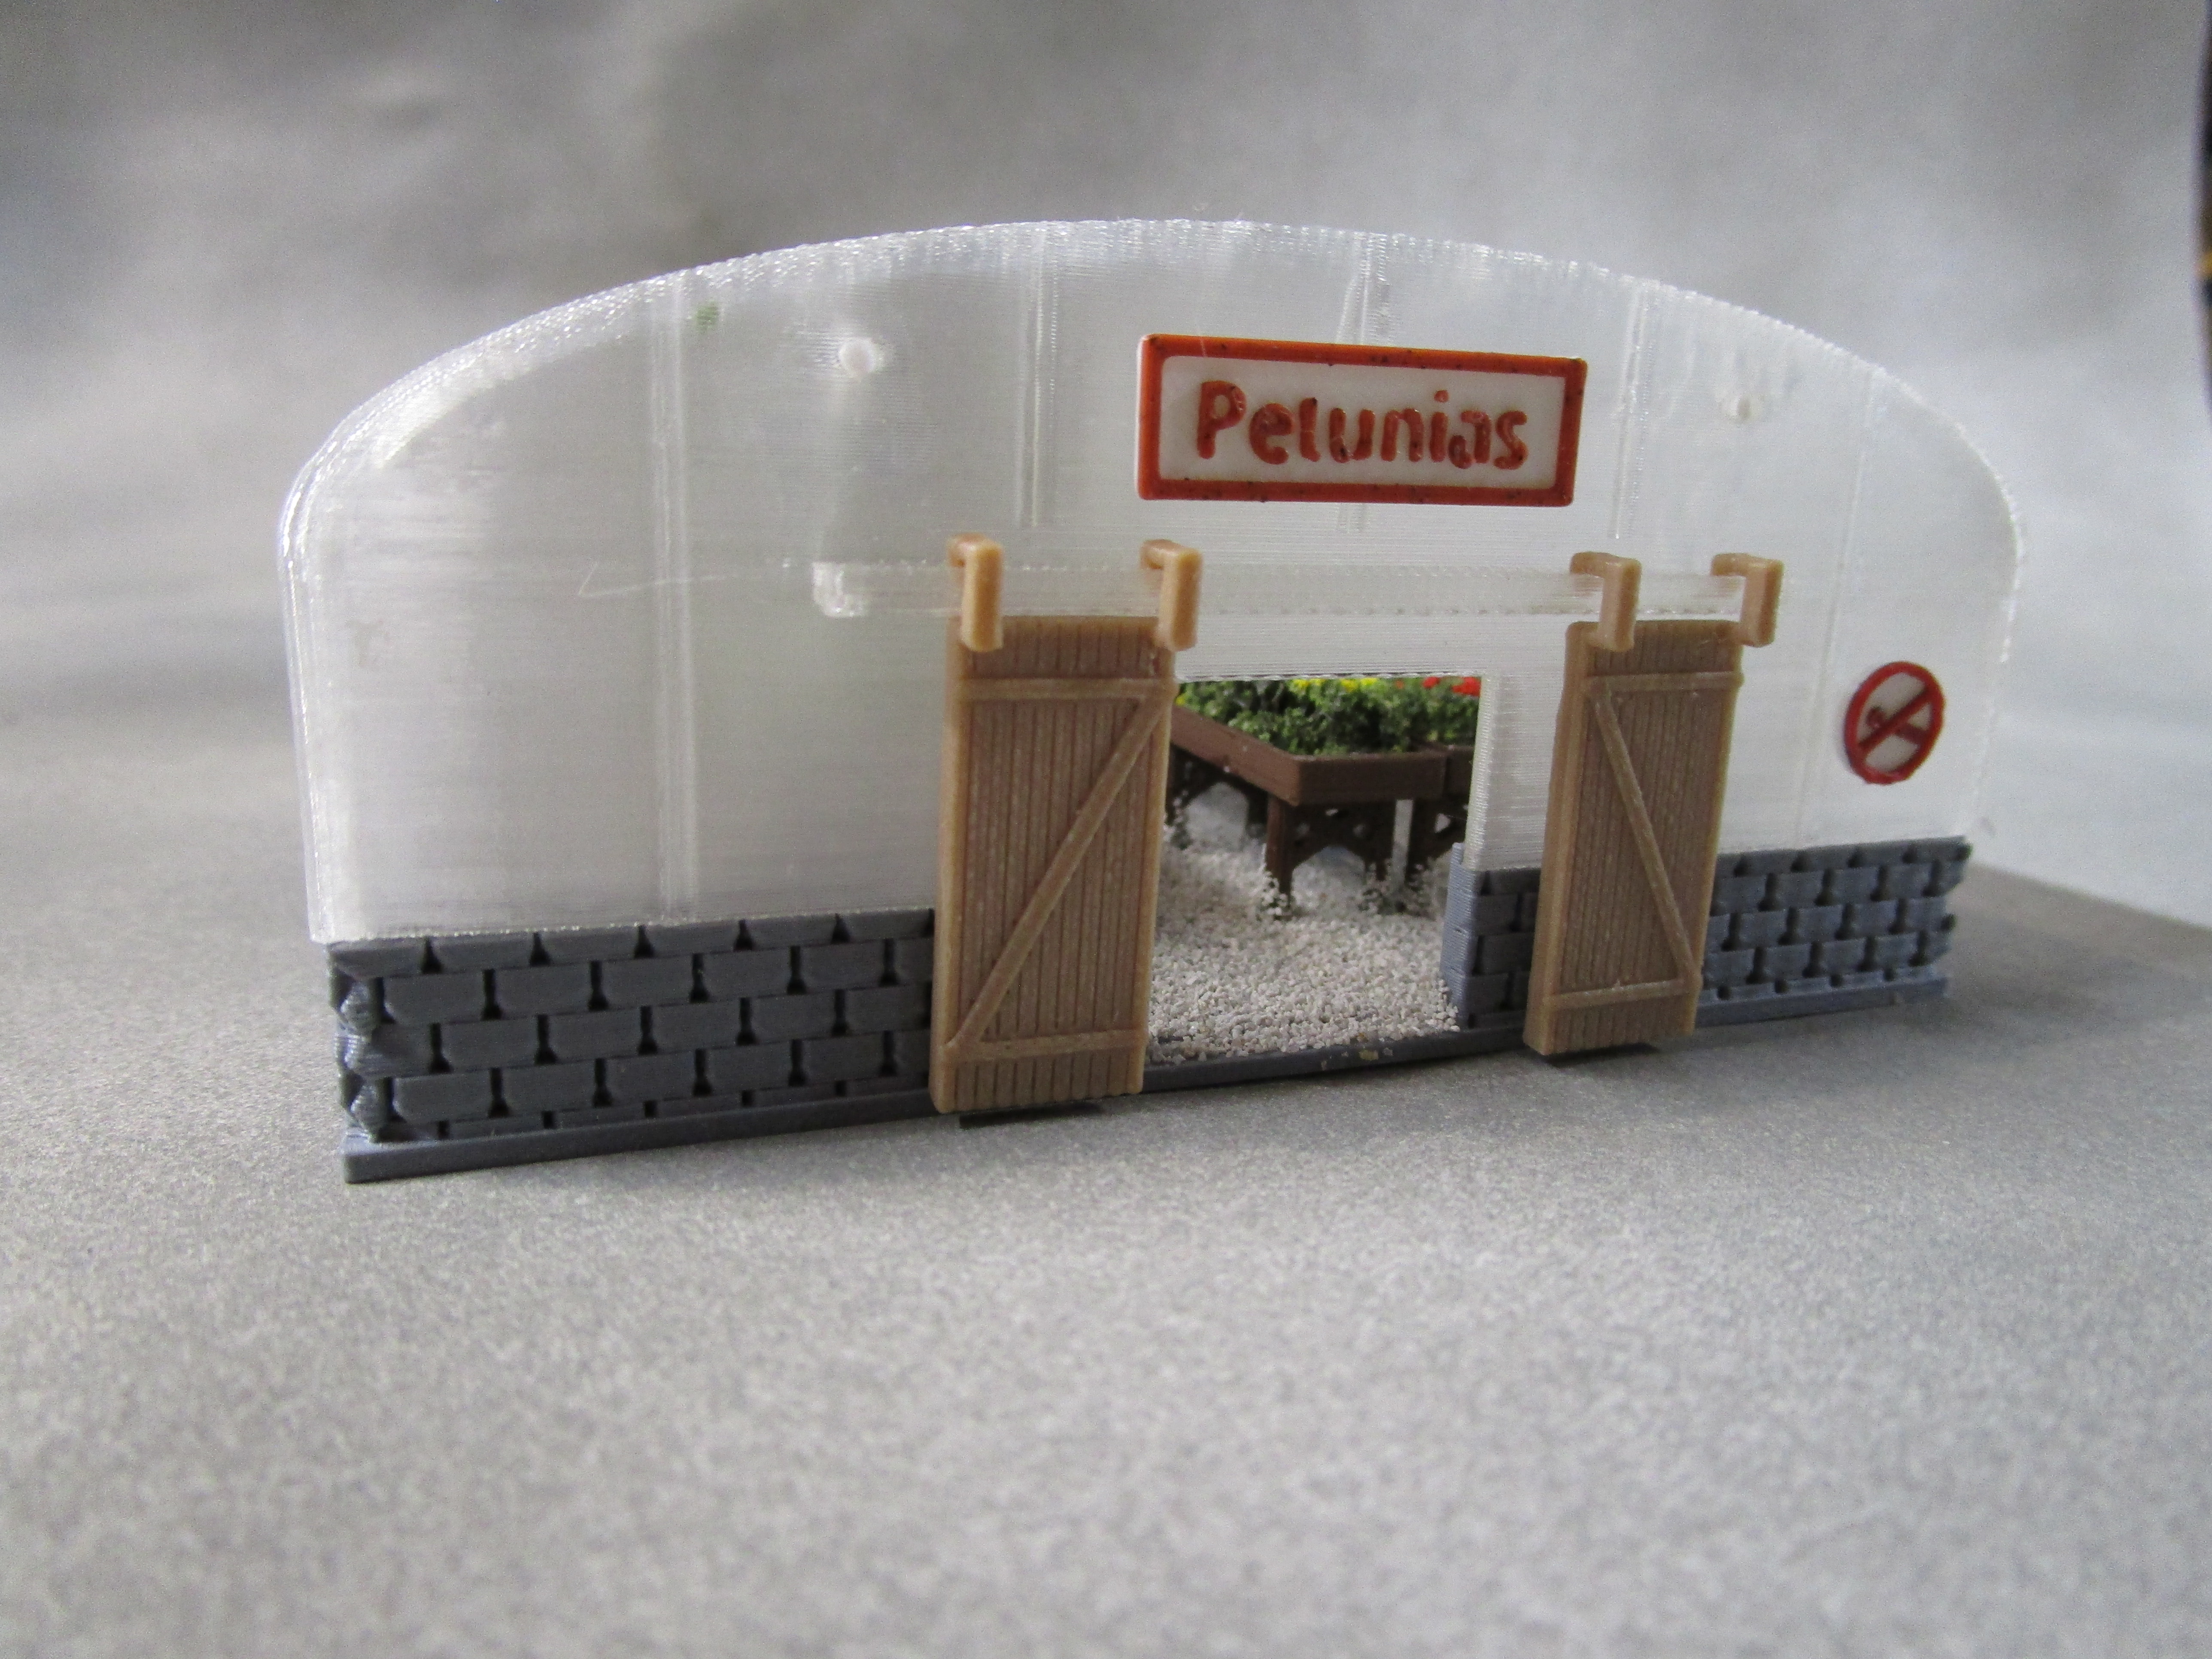 Petunia Greenhouse - This model is a freelance interpretation of a greenhouse
at a nursery in St Charles County, Missouri. The foundation and cover were created using custom software I created.
The plant racks were drawn in TinkerCAD and the piers also created with my custom software. Foliage strips
were cut and inserted into the racks. Mod Podge was applied to the floor and fine gravel glued in place.
A furnace and vents were drawn and installed in the roof, as well as irrigation lines. The signage was 3D printed
and the doors are operational. This model received a Merit Award at the November 2024 Meet
of the Gateway Division of the NMRA.
Petunia Greenhouse - This model is a freelance interpretation of a greenhouse
at a nursery in St Charles County, Missouri. The foundation and cover were created using custom software I created.
The plant racks were drawn in TinkerCAD and the piers also created with my custom software. Foliage strips
were cut and inserted into the racks. Mod Podge was applied to the floor and fine gravel glued in place.
A furnace and vents were drawn and installed in the roof, as well as irrigation lines. The signage was 3D printed
and the doors are operational. This model received a Merit Award at the November 2024 Meet
of the Gateway Division of the NMRA.
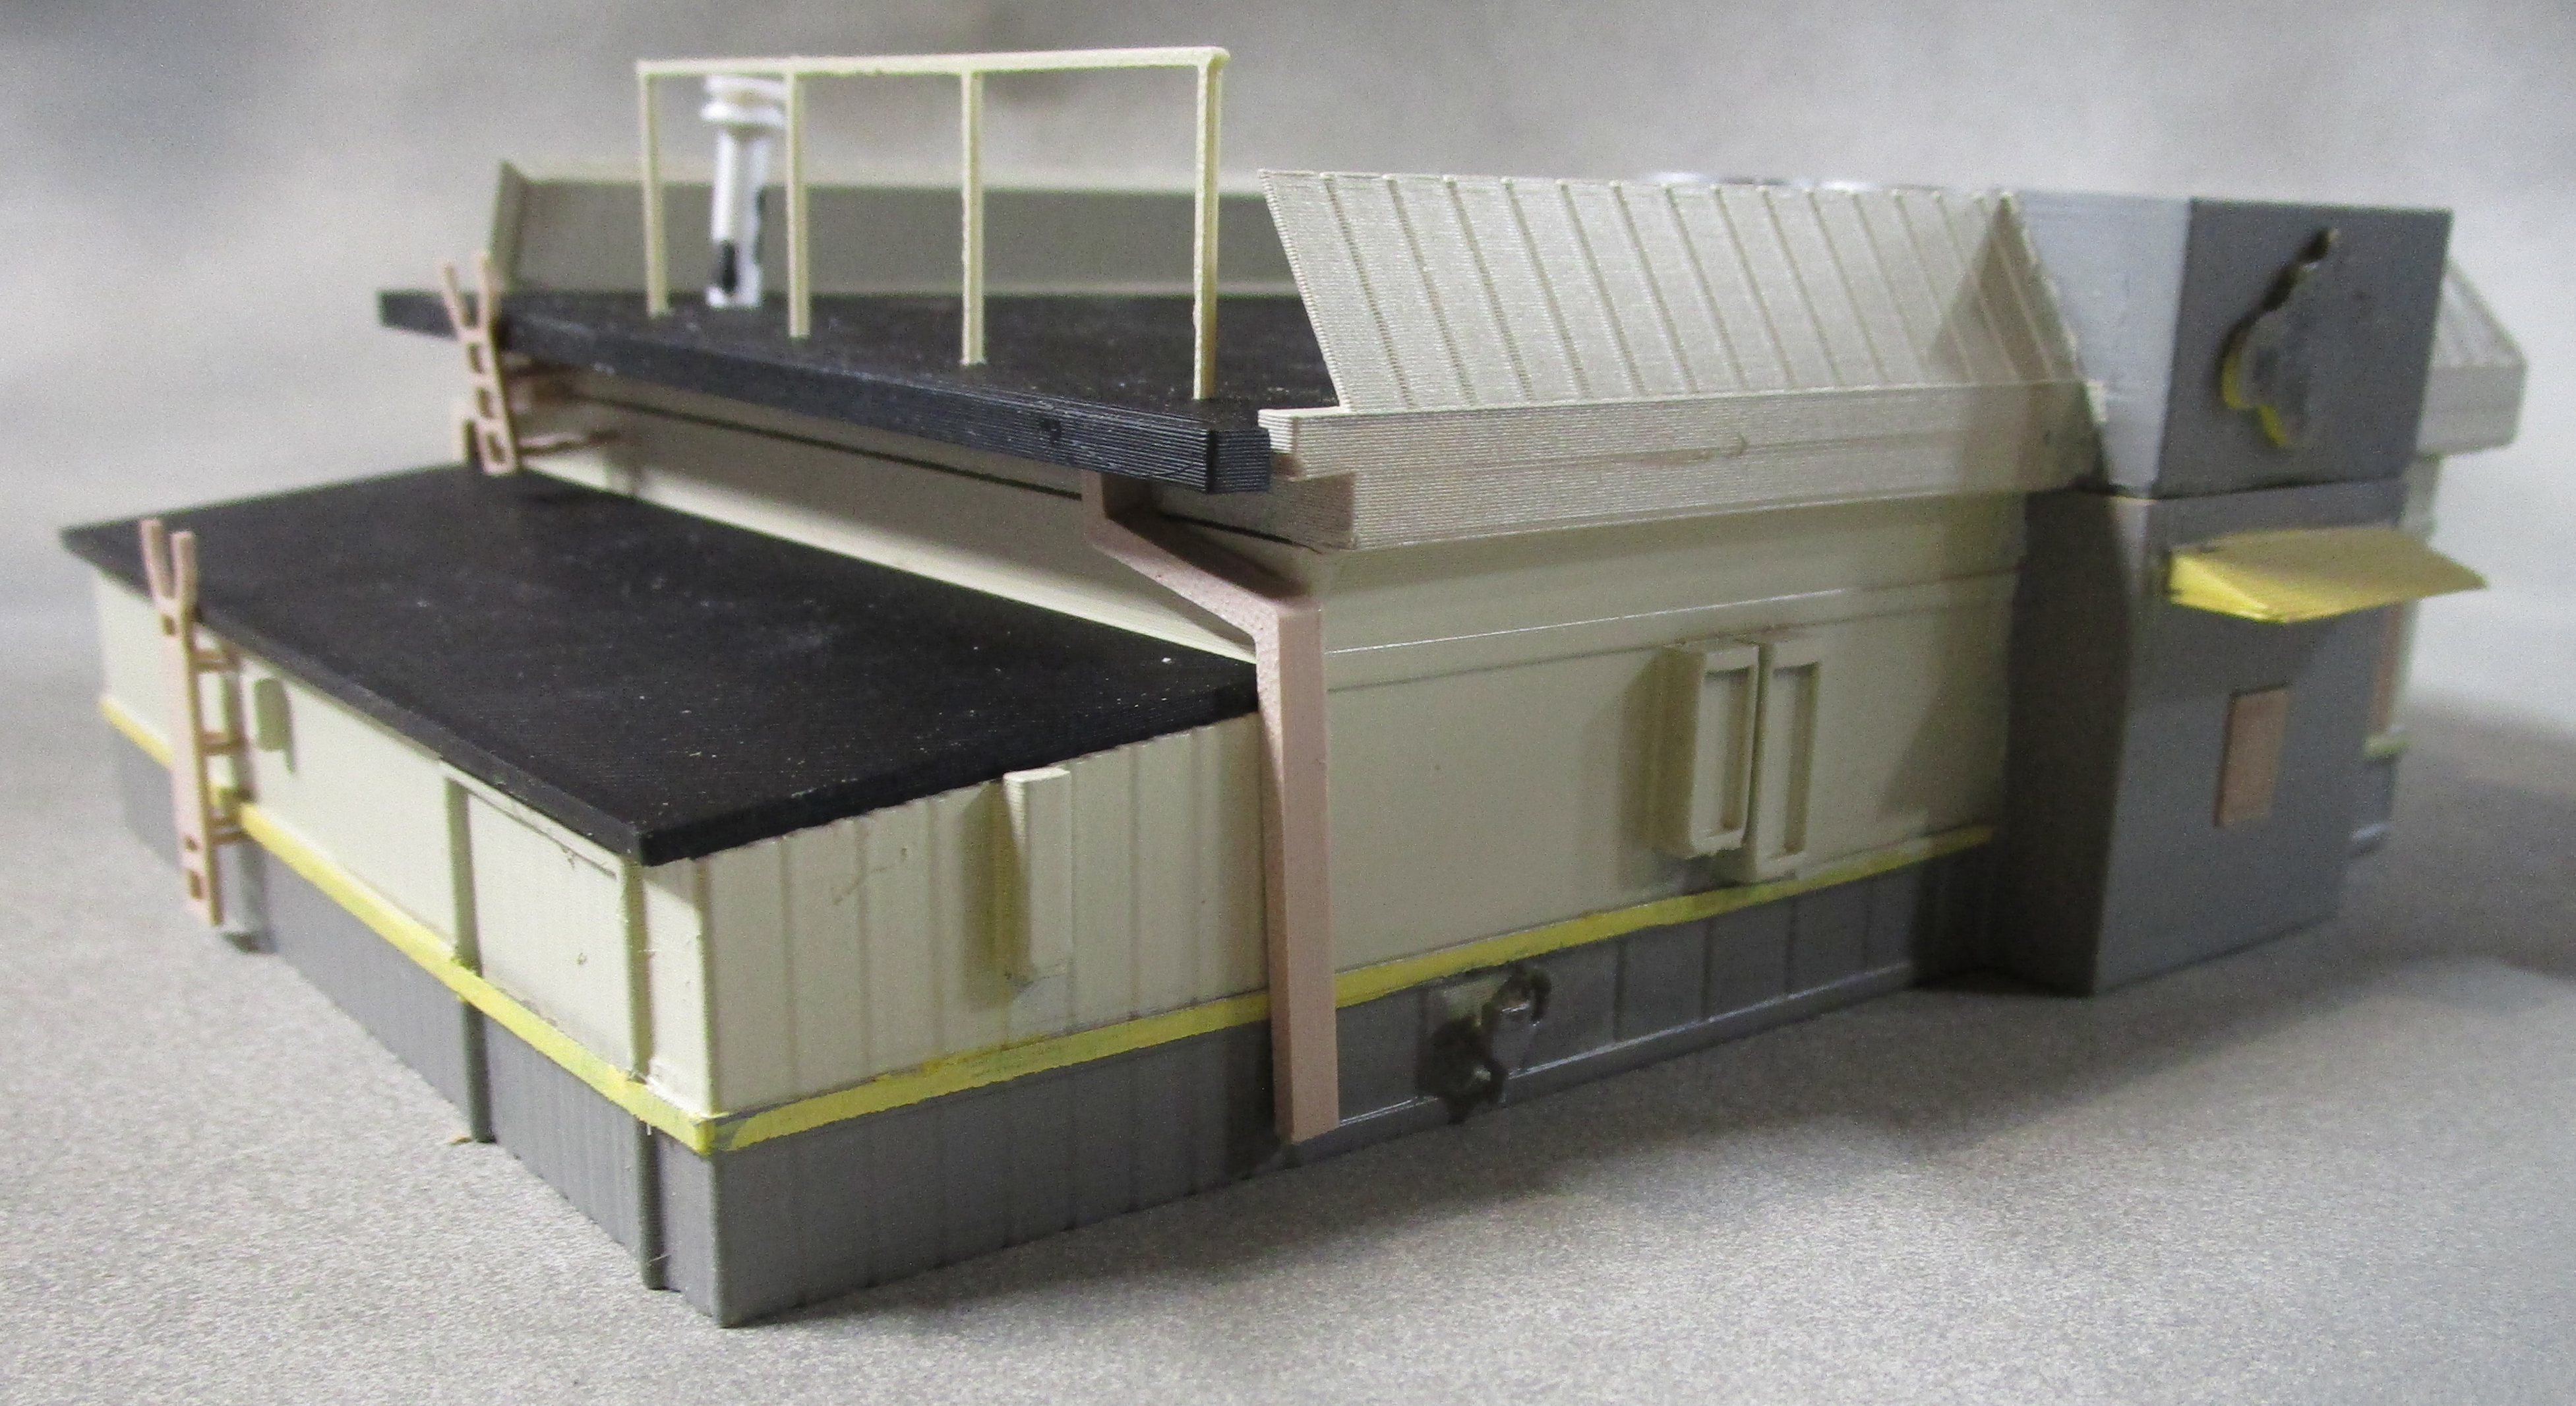
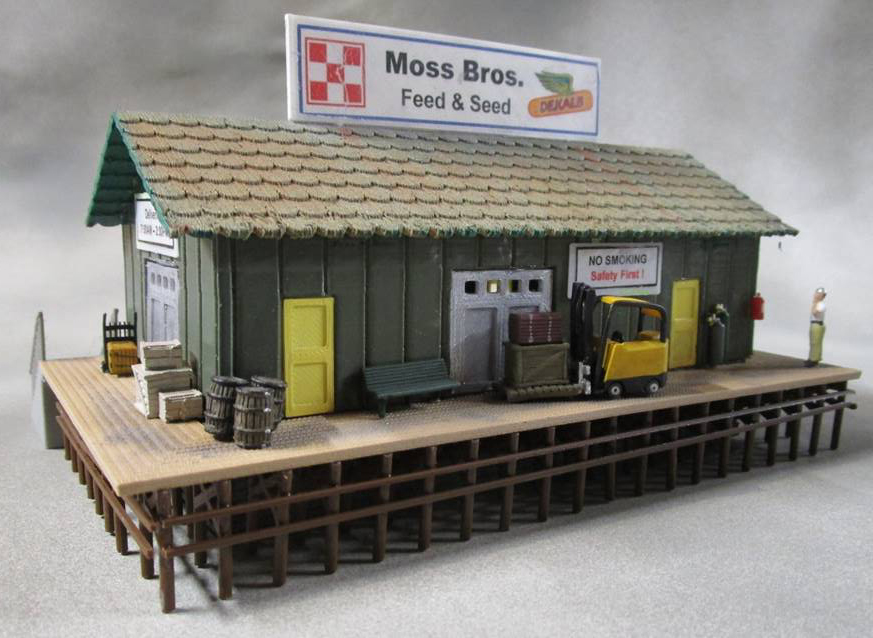 Moss Bros Freight House - This model is a freelance interpretation of small trackside
freight house somewhere along the tracks. The walls, roof, dock, piers and stairs were all created using custom software I
wrote. OpenSCAD and TinkerCAD were also used extensively. The sign on the roof peak is a custom decal. Figures
are Woodland Scenics. This model received a Merit Award at the November 2024 Meet of the Gateway Division of the NMRA.
Moss Bros Freight House - This model is a freelance interpretation of small trackside
freight house somewhere along the tracks. The walls, roof, dock, piers and stairs were all created using custom software I
wrote. OpenSCAD and TinkerCAD were also used extensively. The sign on the roof peak is a custom decal. Figures
are Woodland Scenics. This model received a Merit Award at the November 2024 Meet of the Gateway Division of the NMRA.
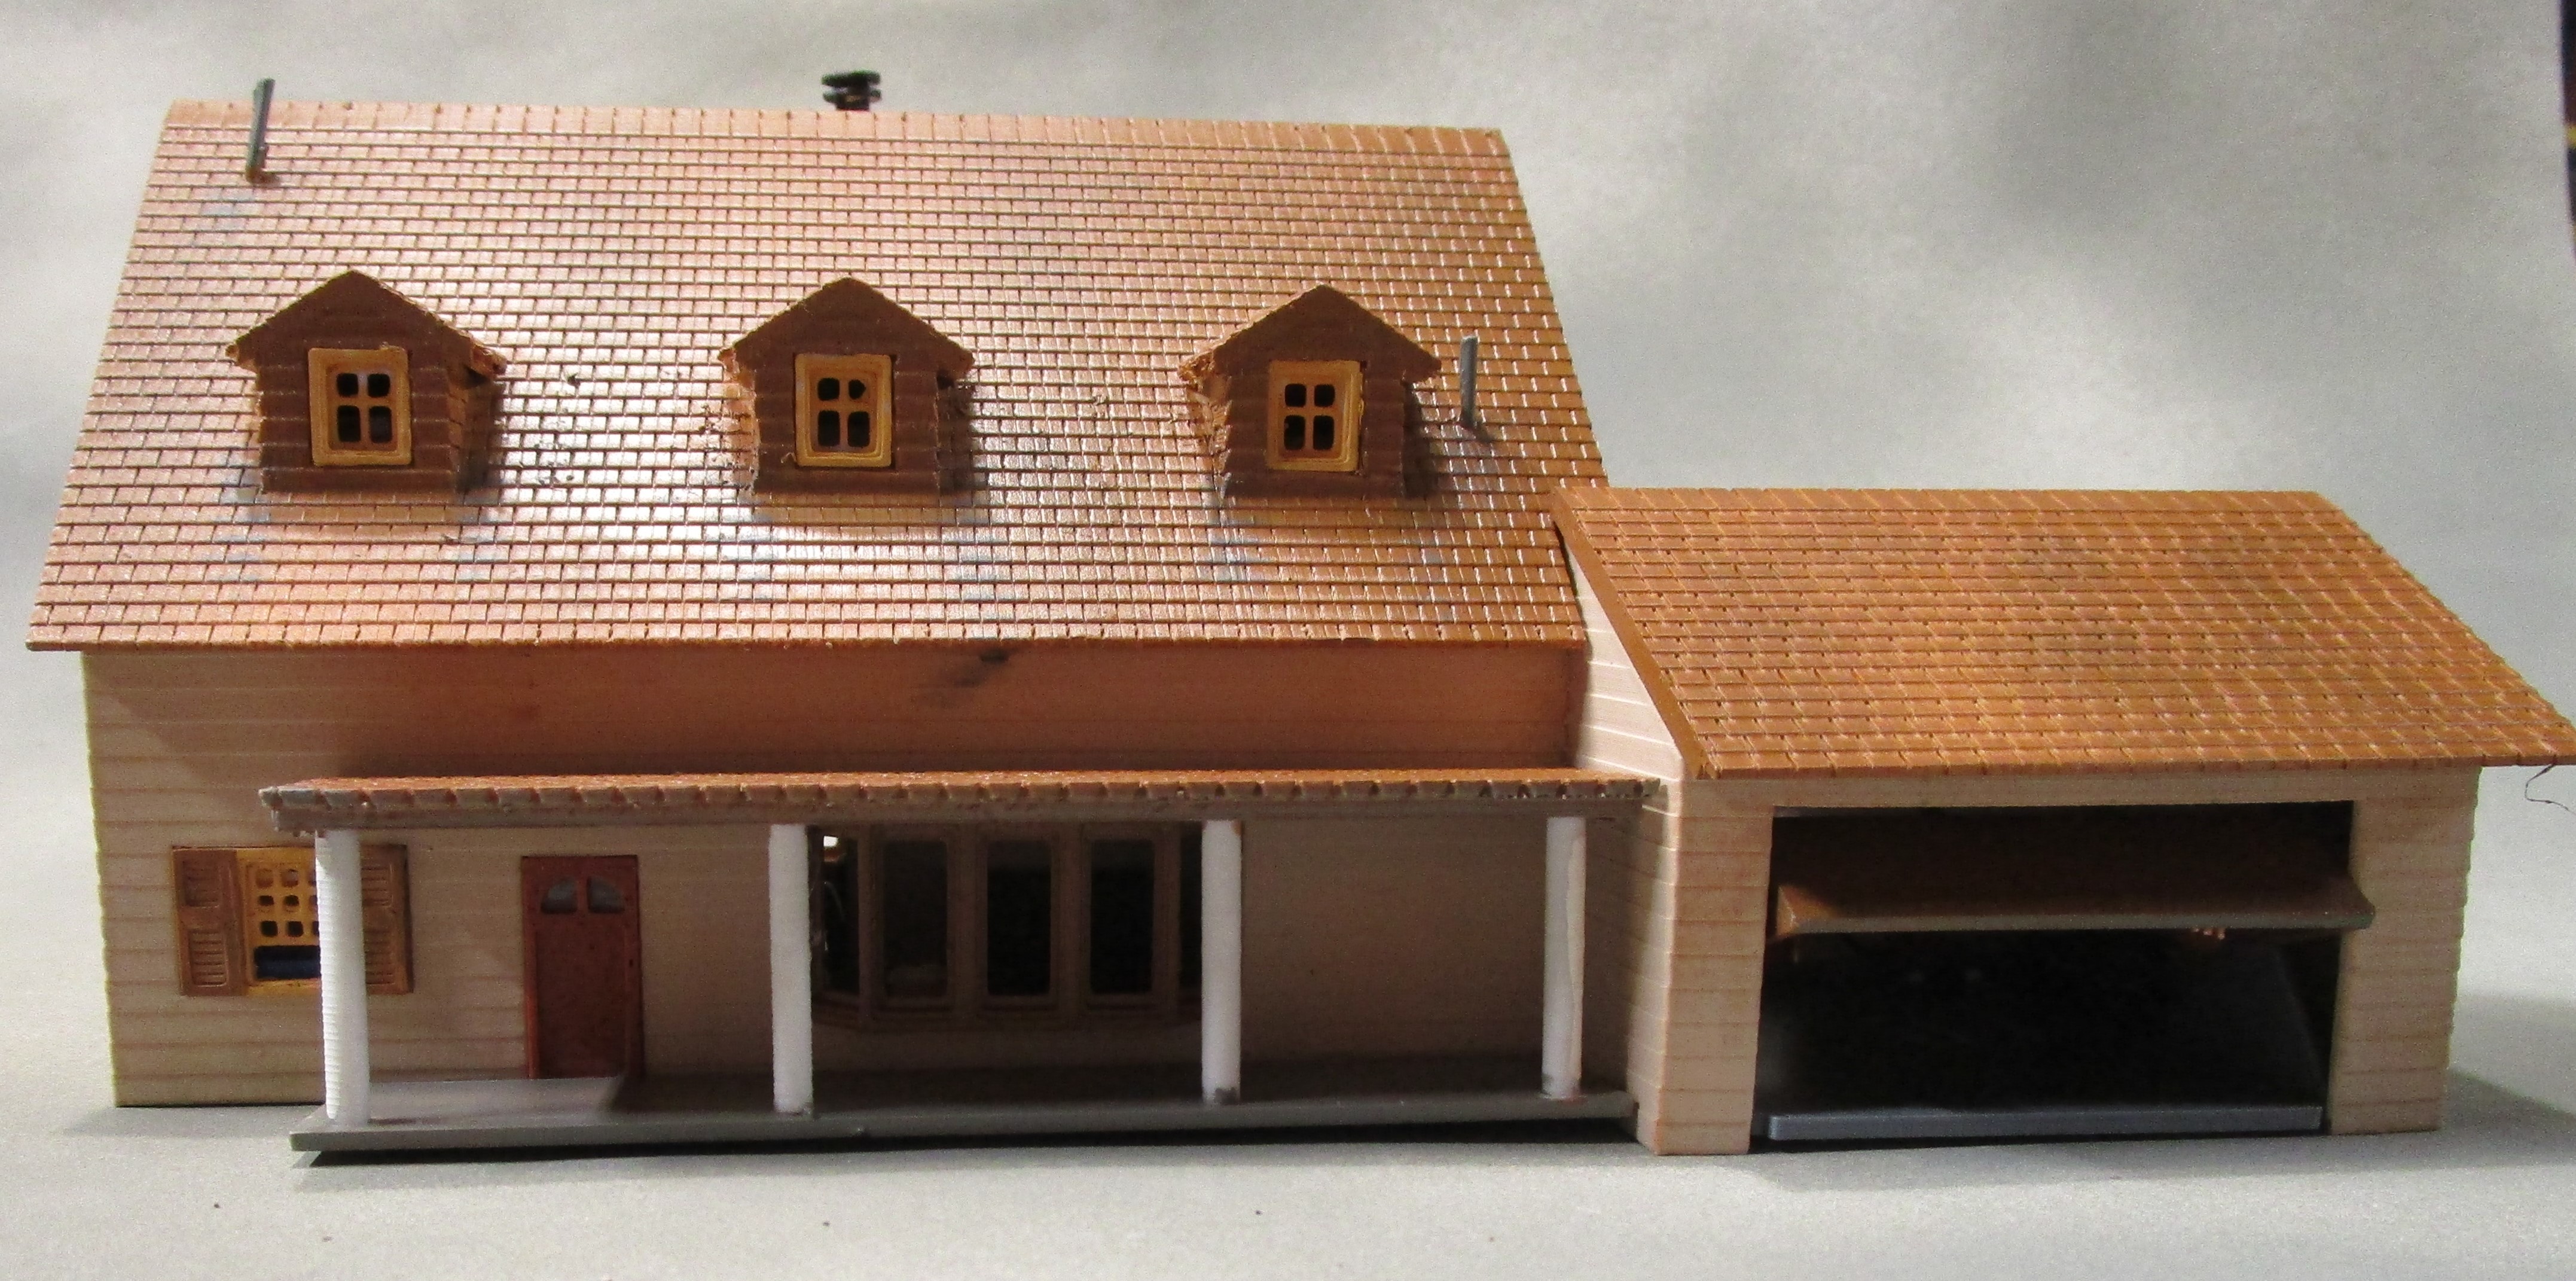
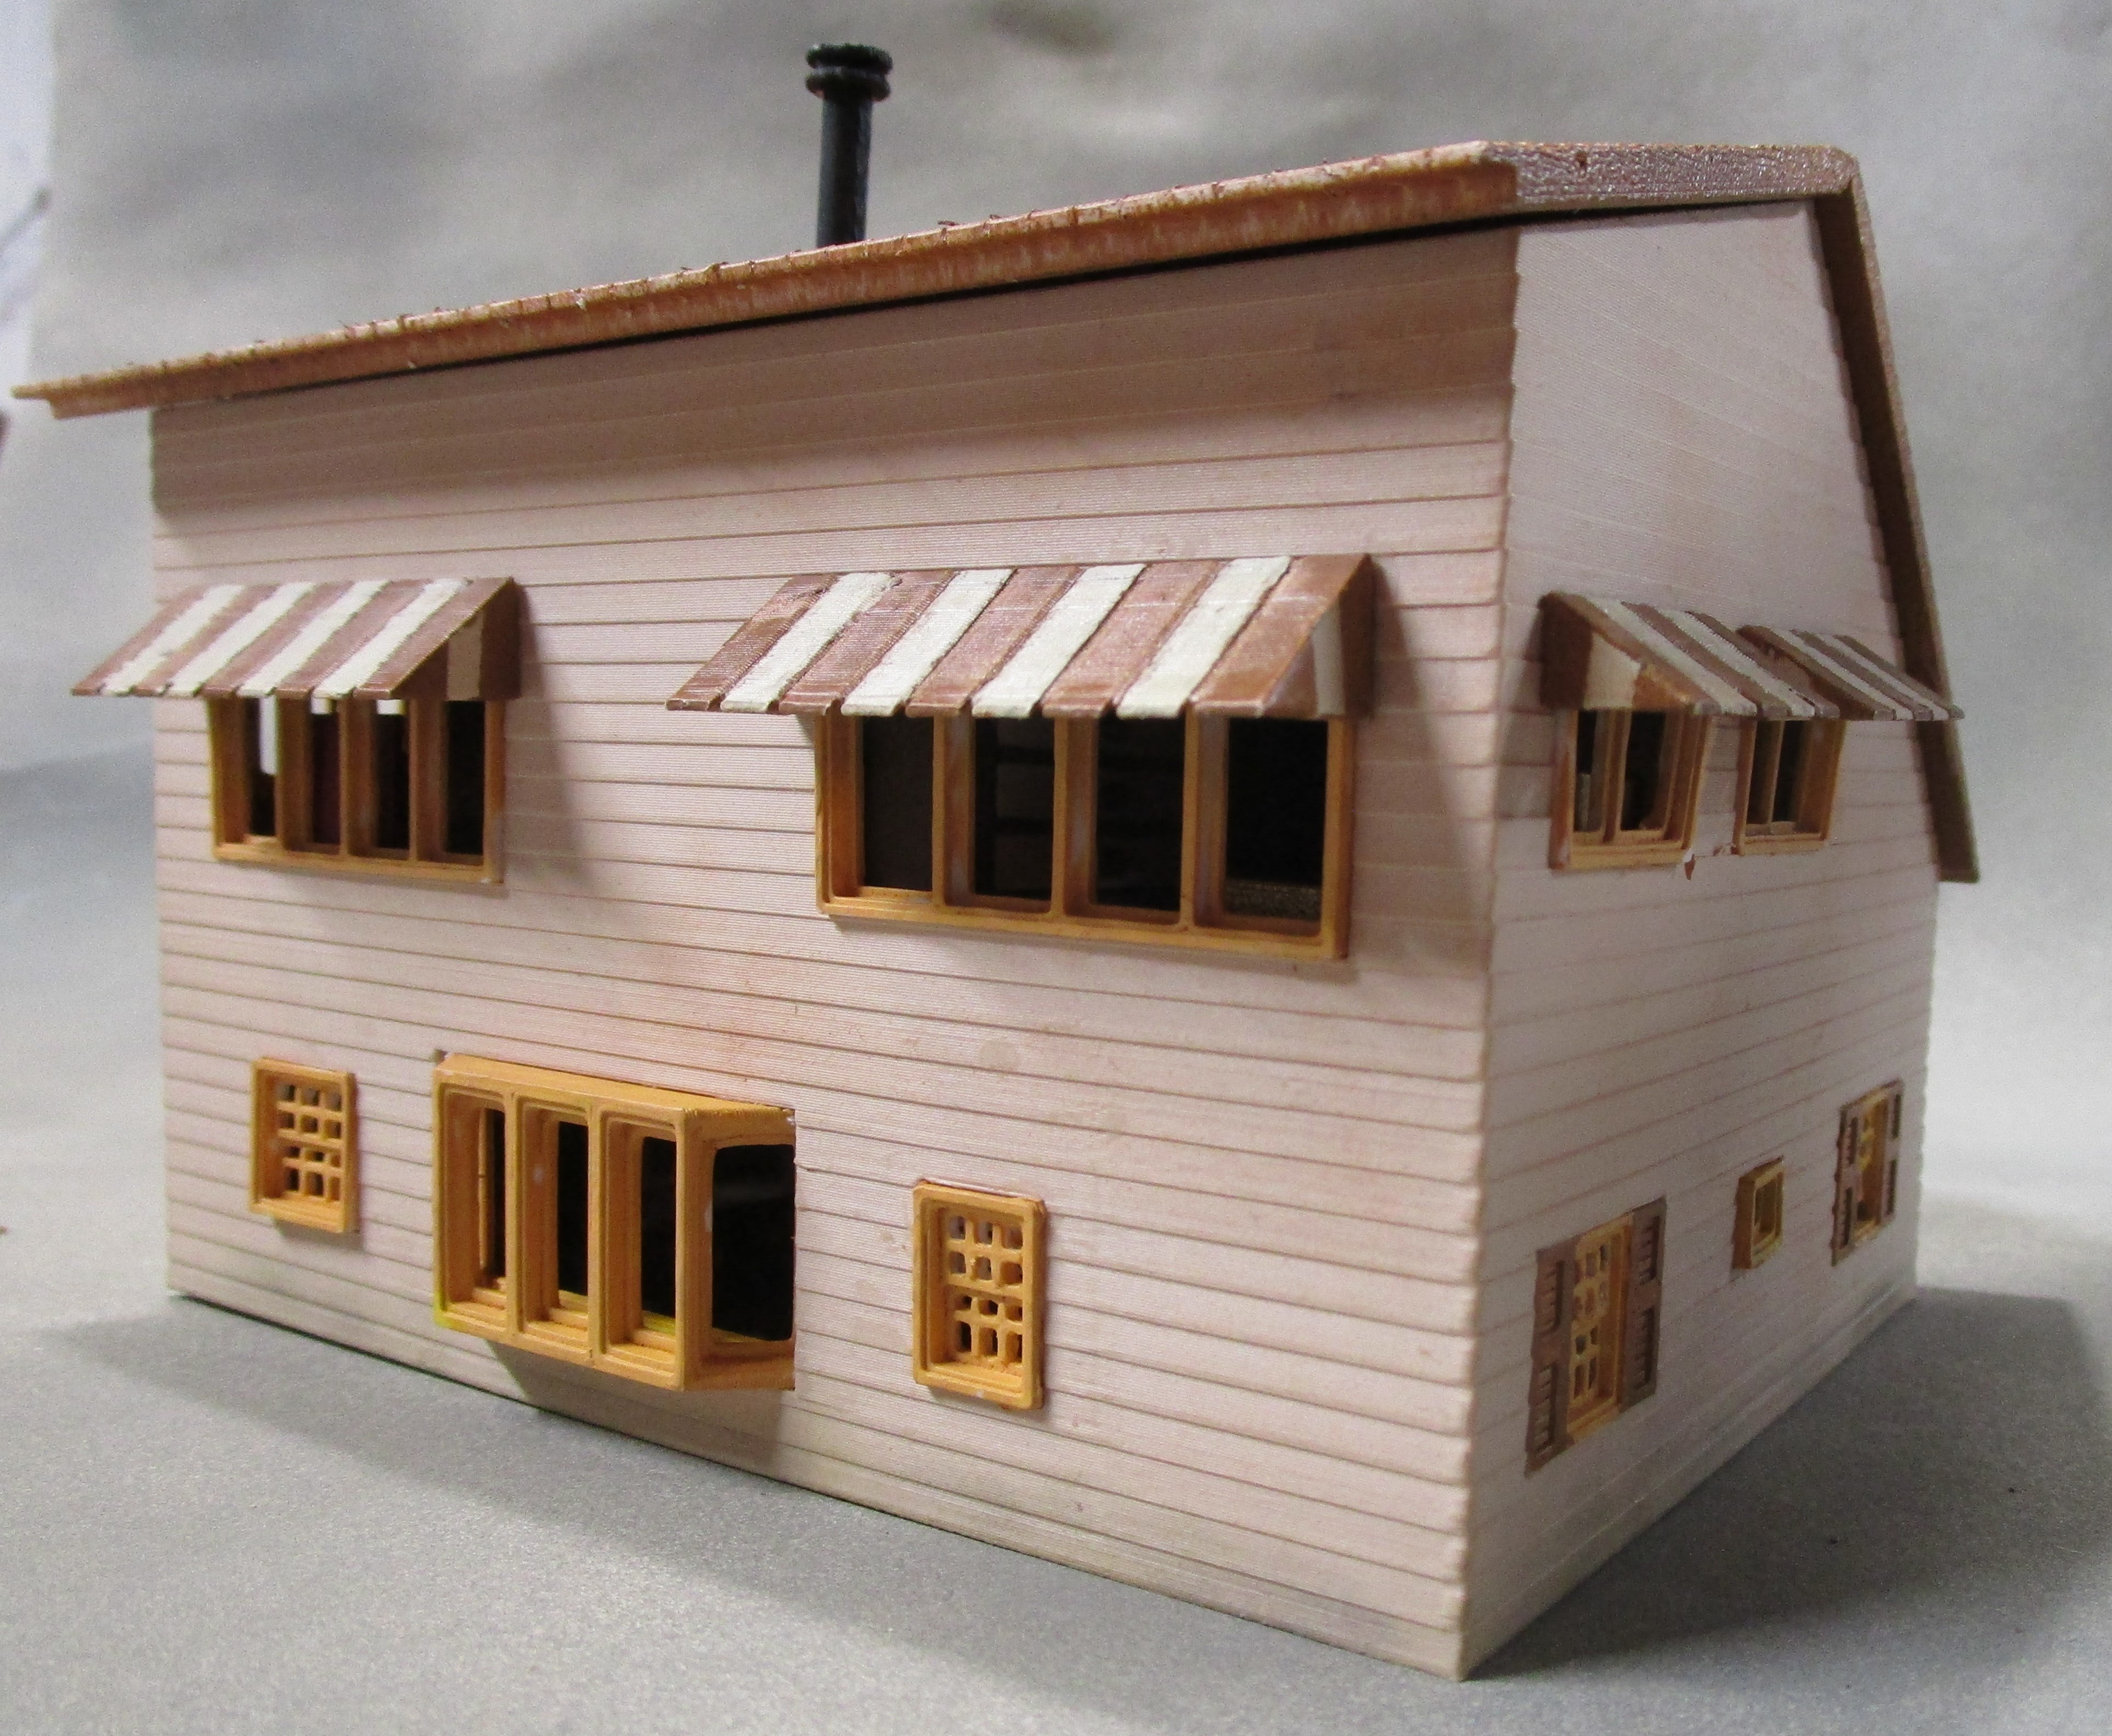 Tidewater House - Here we have a model of the house of friends. Architecturally, a "Tidewater"
House has two stories, with a different roof slope in the front and back. Joining the main roof to the garage,
with the different slopes and the intersection,
was tricky, and took about a dozen iterations to get it to an acceptable point.
This project also taught me that if one enters a contest with a model featuring multiple floors and interiors, it is best
to leave the floors separate from the shell, so that evaluators can more easily see and appreciate the work;
"Monty's Motors" below features another approach.. Most of the model was
created using my Generator software, and featured my first attempt at bay windows.
This model received a Merit Award at the 2025 Mid-Continent Region NMRA Convention.
Tidewater House - Here we have a model of the house of friends. Architecturally, a "Tidewater"
House has two stories, with a different roof slope in the front and back. Joining the main roof to the garage,
with the different slopes and the intersection,
was tricky, and took about a dozen iterations to get it to an acceptable point.
This project also taught me that if one enters a contest with a model featuring multiple floors and interiors, it is best
to leave the floors separate from the shell, so that evaluators can more easily see and appreciate the work;
"Monty's Motors" below features another approach.. Most of the model was
created using my Generator software, and featured my first attempt at bay windows.
This model received a Merit Award at the 2025 Mid-Continent Region NMRA Convention.
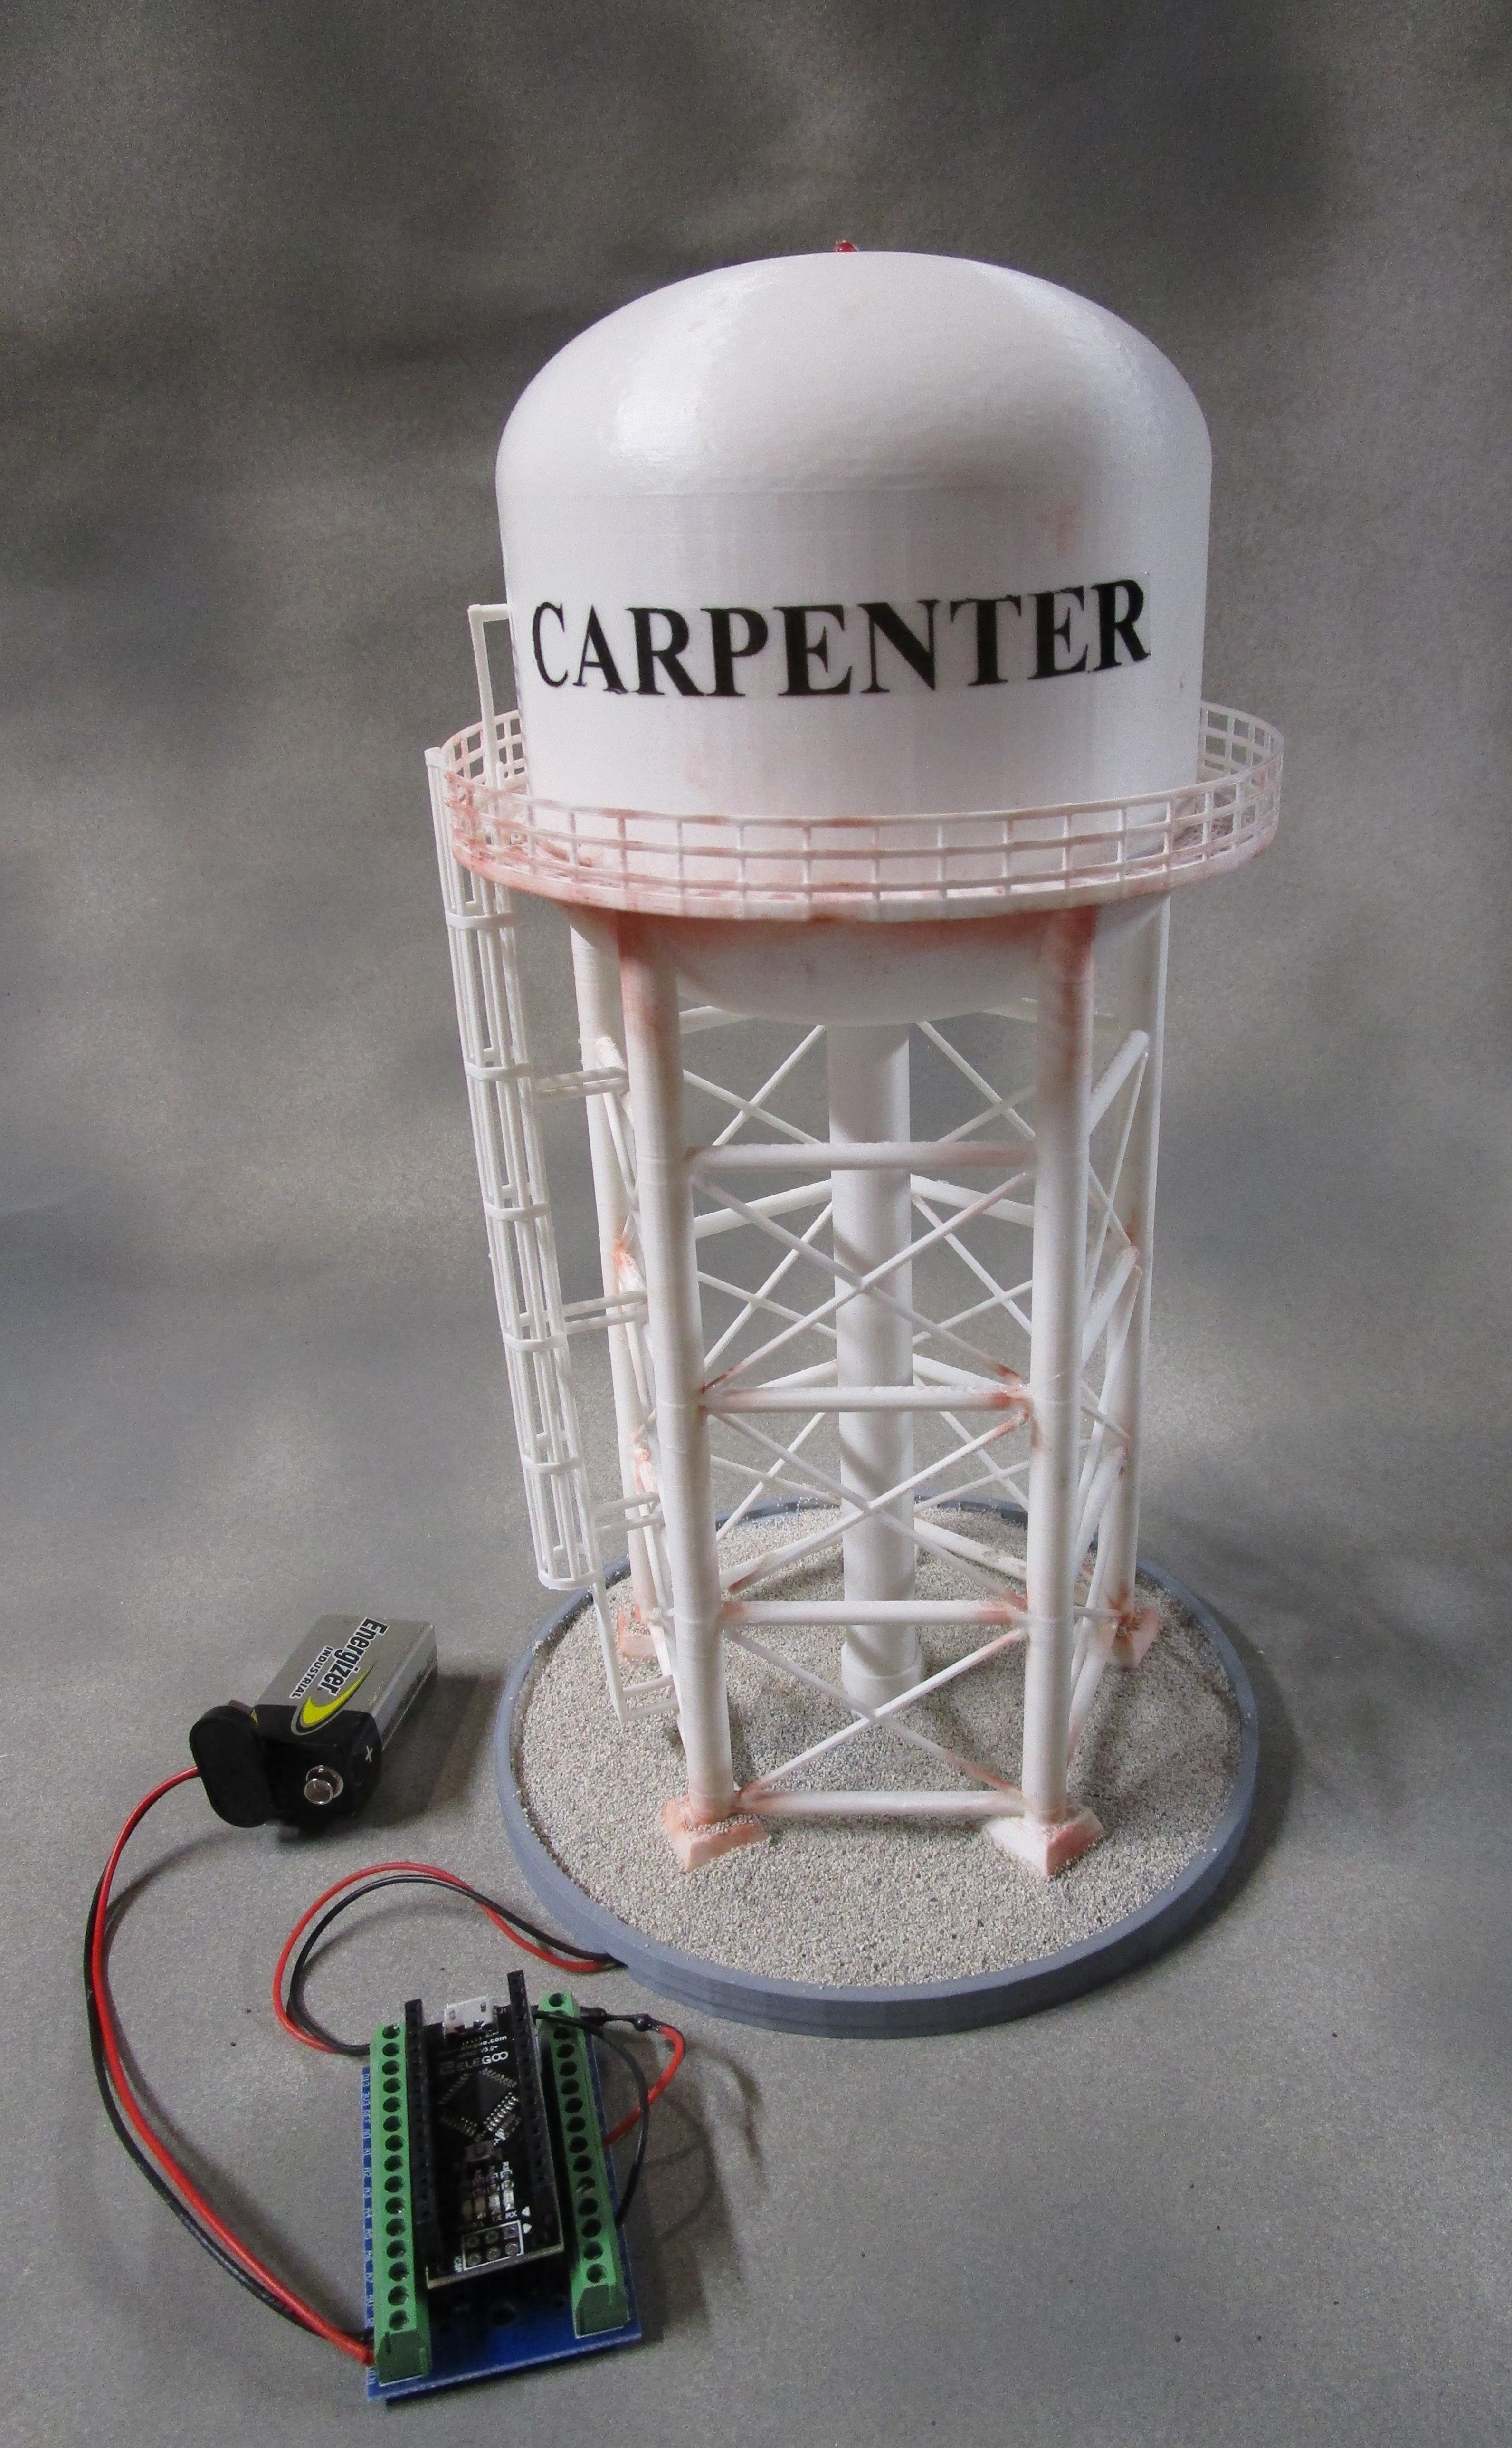 Carpenter Water Tower - I created this model in the summer of 2025 after a village water storage tank
in Carpenter Illinois. I used "Generator" software I wrote to create the
dome, tank, catwalk, legs, ladder and cage, and the software can create models with anywhere between 3 and 12 legs and a variety of tank sizes.
The tank fits on the leg set (which I print upside down) using a "lip" for a secure fit.
The catwalk and ladder assembly fits together after I cut a small "hole" in the catwalk using TinkerCAD, and extensions from the back of the ladder
are sized to be glued to the top of the horizontal compression arms.
Surprisingly, the catwalk is printed using a 0.4mm nozzle and 0.20mm layer height, nothing finer. The model took 1st place in the
Structures category at the 2025 NMRA Mid-Continent Regional Convention.
Carpenter Water Tower - I created this model in the summer of 2025 after a village water storage tank
in Carpenter Illinois. I used "Generator" software I wrote to create the
dome, tank, catwalk, legs, ladder and cage, and the software can create models with anywhere between 3 and 12 legs and a variety of tank sizes.
The tank fits on the leg set (which I print upside down) using a "lip" for a secure fit.
The catwalk and ladder assembly fits together after I cut a small "hole" in the catwalk using TinkerCAD, and extensions from the back of the ladder
are sized to be glued to the top of the horizontal compression arms.
Surprisingly, the catwalk is printed using a 0.4mm nozzle and 0.20mm layer height, nothing finer. The model took 1st place in the
Structures category at the 2025 NMRA Mid-Continent Regional Convention.
;
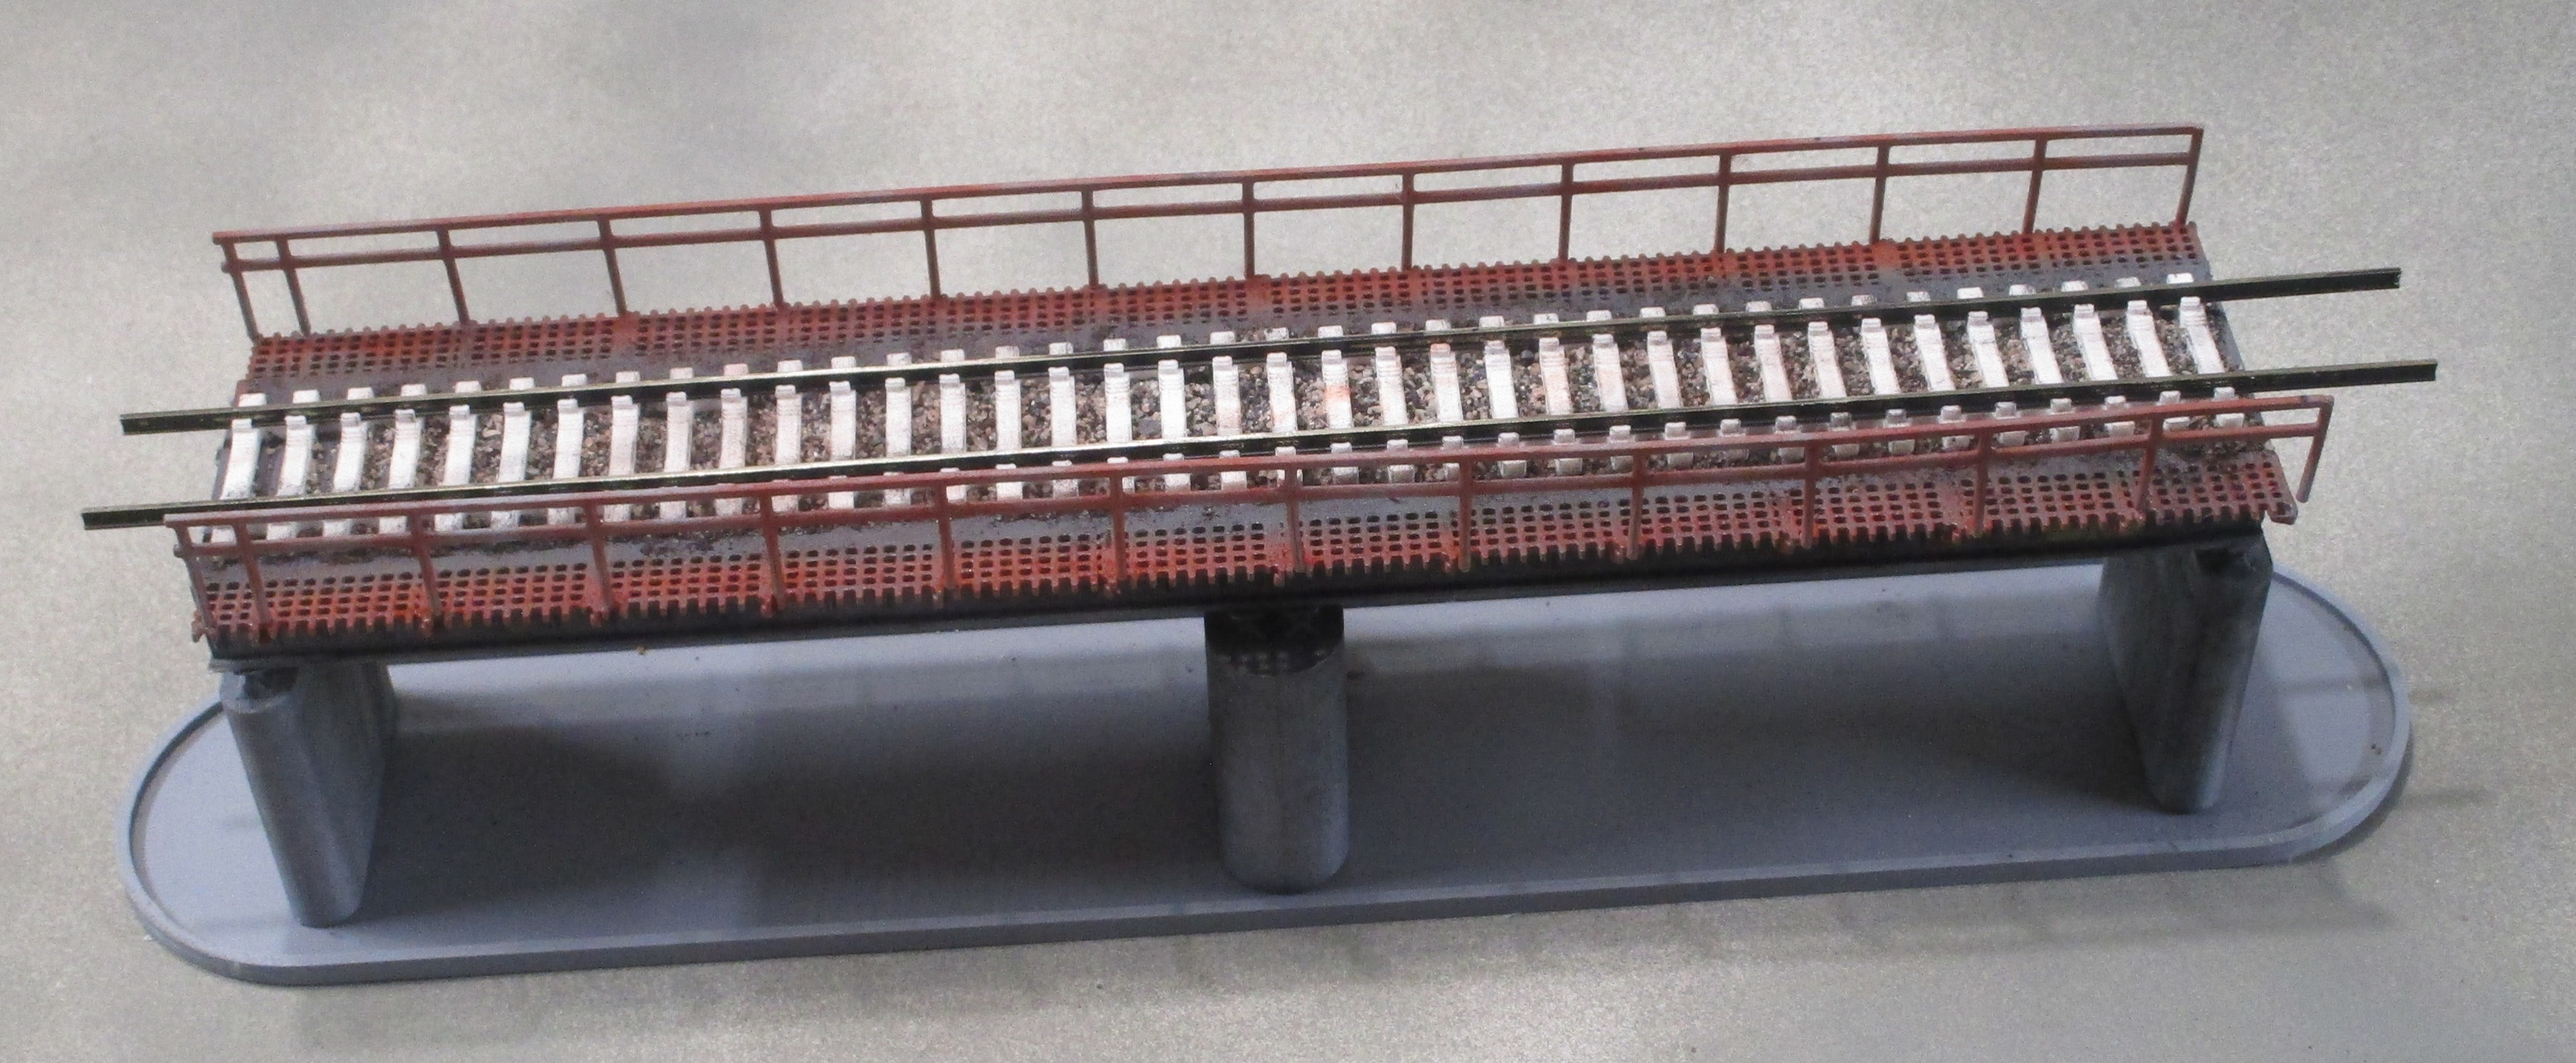 College Avenue Bridge - Alton IL This bridge over Illinois 140,
just South of the now demolished old Alton Station, completed my requirements for the NMRA Achievement Program Structures
Certificate. Spanning 6 lanes of traffic, plus sidewalks, it was selectively compressed to be
manageable. Designed with custom software I wrote, composited in TinkerCAD and printed on my Bambu P1S 3D printer.
Except for the rails and ballast, it was totally scratch built, and features support shoes
and custom concrete flex track. Weathering was accomplished with Pan Pastels.
College Avenue Bridge - Alton IL This bridge over Illinois 140,
just South of the now demolished old Alton Station, completed my requirements for the NMRA Achievement Program Structures
Certificate. Spanning 6 lanes of traffic, plus sidewalks, it was selectively compressed to be
manageable. Designed with custom software I wrote, composited in TinkerCAD and printed on my Bambu P1S 3D printer.
Except for the rails and ballast, it was totally scratch built, and features support shoes
and custom concrete flex track. Weathering was accomplished with Pan Pastels.
This model took
First Place in the On-Line Structures category at the November, 2025 Meet of the Gateway Division of the NMRA
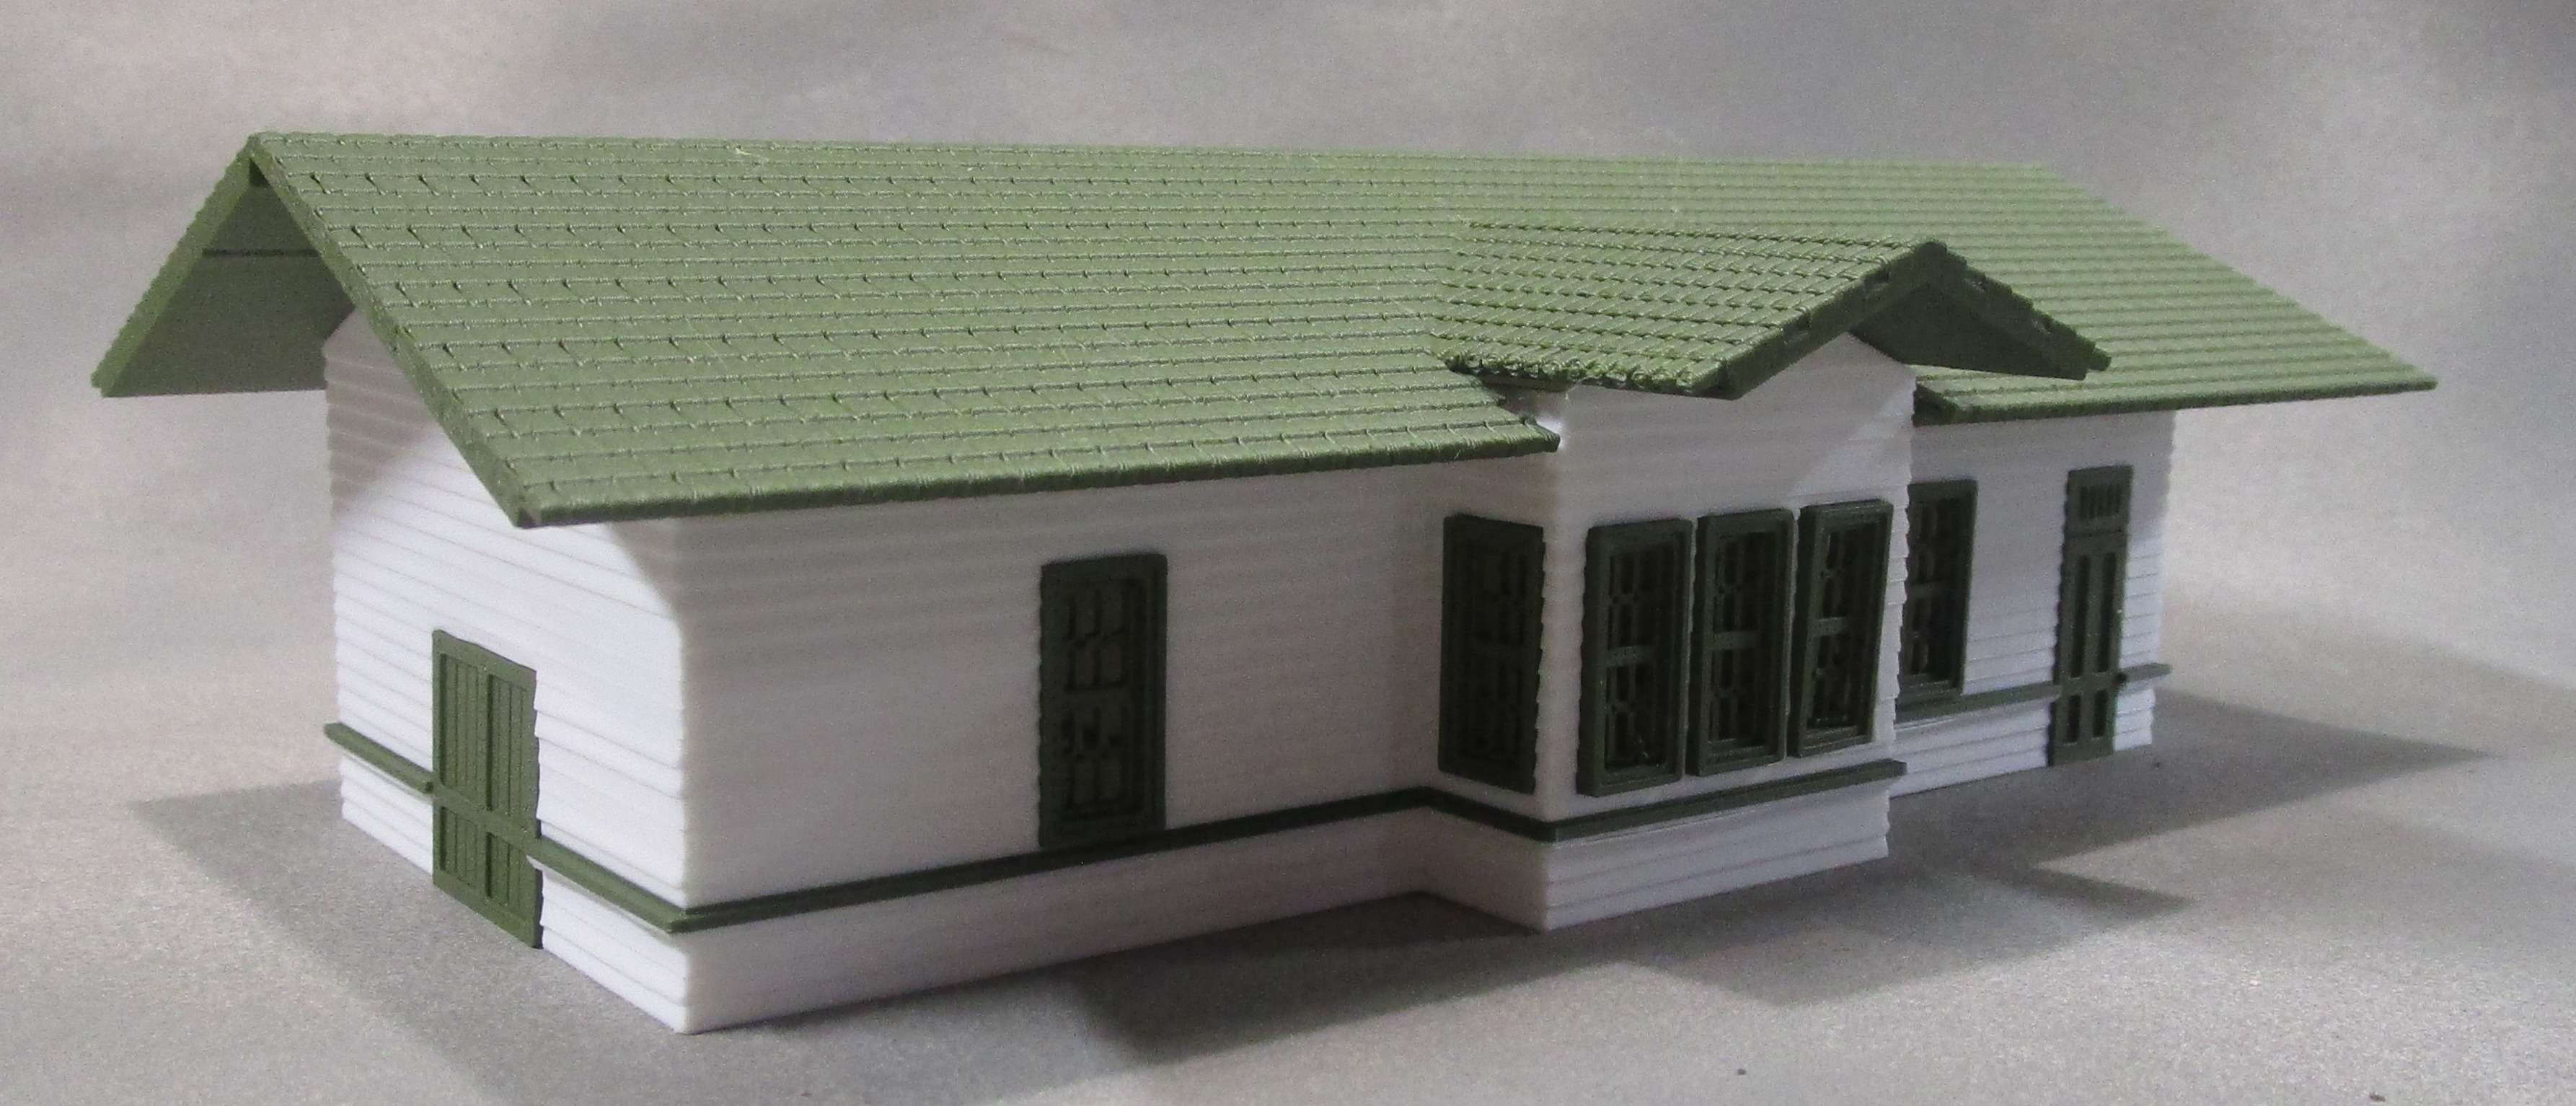 Clarksville MO Depot Demolished in the 1960s, this model is based on
photos and drawings furnished by historian John Andrews, and eventually will reside on a FreeMO layout in West Alton MO
sponsored by the Gateway.Division of the NMRA. I designed the walls, roofing and windows using Generator software I developed.
The doors, signage and other features were created in TinkerCAD and all were printed on my Bambu P1S.
It still needs roof supports, gutters, and mouldings where the walls intersects, but no railroad (or sometimes a model) is ever done.
This model took
Second Place in the On-Line Structures category at the November, 2025 Meet of the Gateway Division of the NMRA.
Clarksville MO Depot Demolished in the 1960s, this model is based on
photos and drawings furnished by historian John Andrews, and eventually will reside on a FreeMO layout in West Alton MO
sponsored by the Gateway.Division of the NMRA. I designed the walls, roofing and windows using Generator software I developed.
The doors, signage and other features were created in TinkerCAD and all were printed on my Bambu P1S.
It still needs roof supports, gutters, and mouldings where the walls intersects, but no railroad (or sometimes a model) is ever done.
This model took
Second Place in the On-Line Structures category at the November, 2025 Meet of the Gateway Division of the NMRA.
;
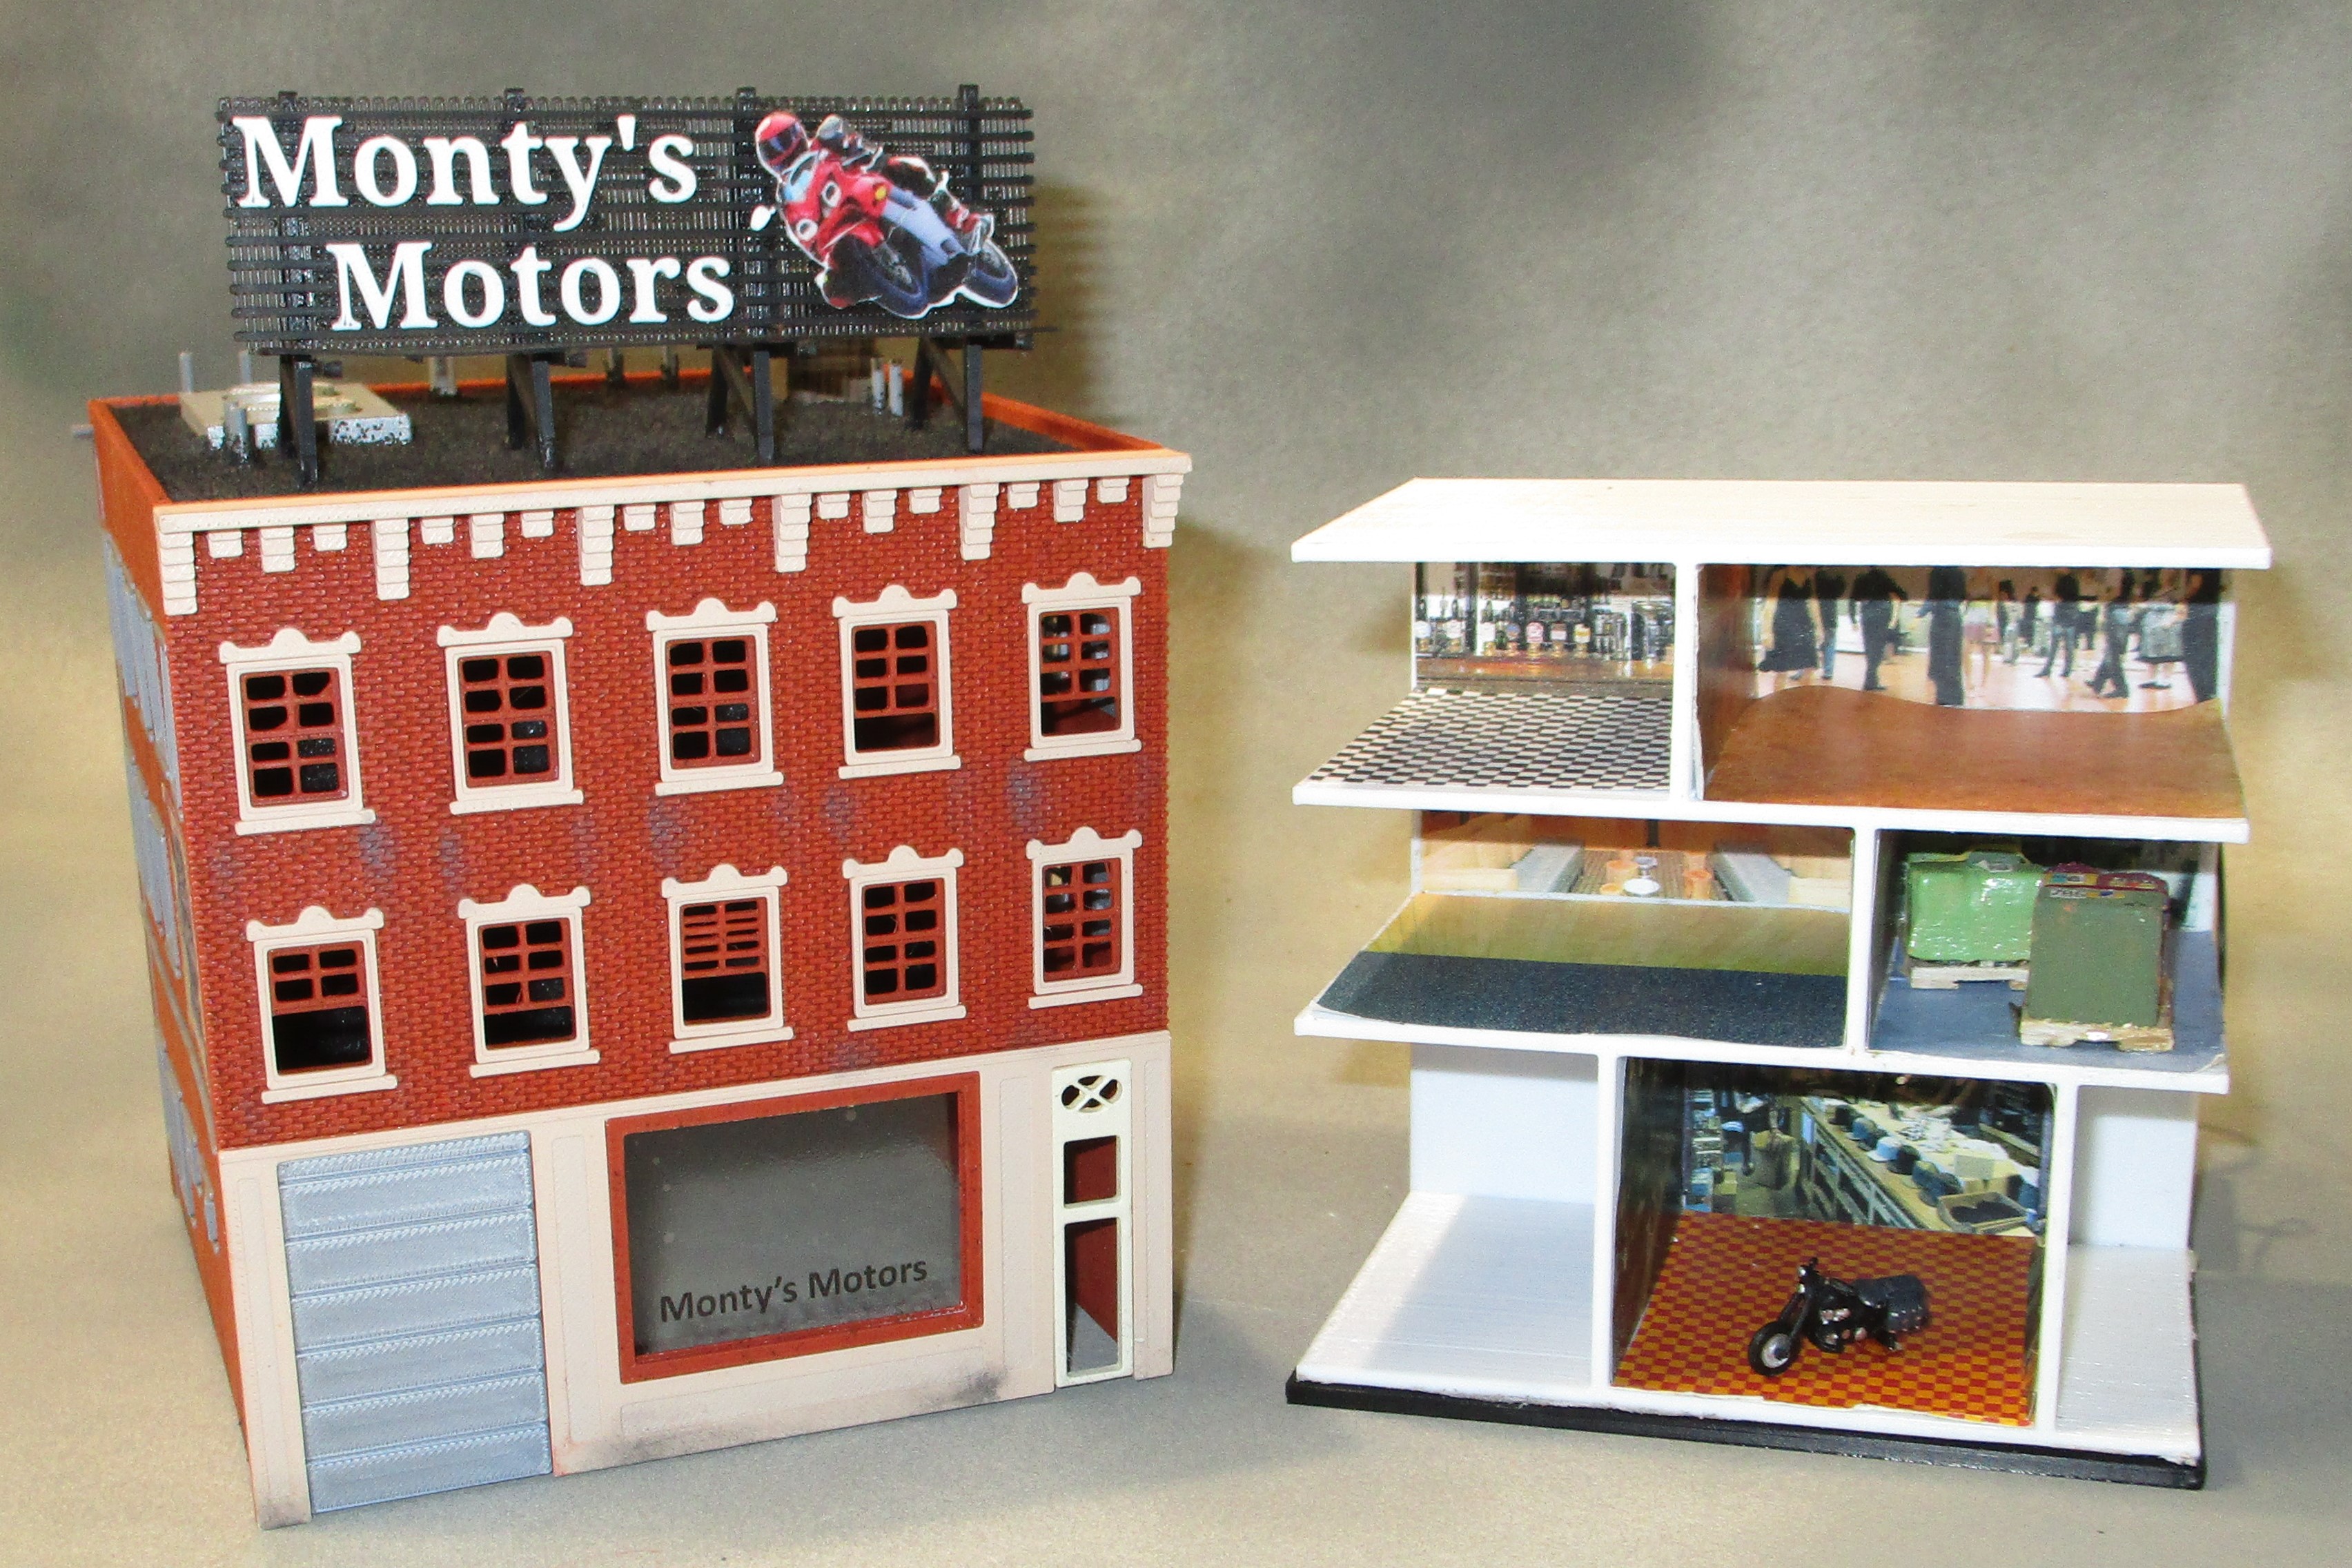 Monty's Motors - This model is based on the "B. Moore Catalog Showroom" from DPM. It has the same footprint
and only a slightly modified window arrangement, but different window lintels and roof cornice. I added an interior and lighting based
on an Arduino sketch I wrote to randomize the on-and-off effect of the LEDs. I am particularly proud of the slatted roof top sign, designed using my
Billboard "Generator" software.
For contest evaluation, I left the interior detached from the exterior to make everything obviously visible. This model took 3rd place in the Structures
category and the 2025 NMRA Mid-continent Regional Convention.
Monty's Motors - This model is based on the "B. Moore Catalog Showroom" from DPM. It has the same footprint
and only a slightly modified window arrangement, but different window lintels and roof cornice. I added an interior and lighting based
on an Arduino sketch I wrote to randomize the on-and-off effect of the LEDs. I am particularly proud of the slatted roof top sign, designed using my
Billboard "Generator" software.
For contest evaluation, I left the interior detached from the exterior to make everything obviously visible. This model took 3rd place in the Structures
category and the 2025 NMRA Mid-continent Regional Convention.
Modeling Fire
Campfires to Forest Fires! Commercial Products to Custom Designs! This clinic explores how to simulate fires, including visual effects,
sound and smoke. Drawing from theater to electronic fireplace technology, you will learn how to create realistic flame effects
for your model railroad. Learn cool ways to satisfy your burning desires!
Complete Clinic
To view the complete 30 minute clinic, click here
If you are interested in a 3D model of a baffle for a 28mm round speaker to help amplify the sound of MP3 files
created on inexpensive electronics like from Ngineering.com or custom Arduino circuits,
click here. I also have a baffle for a 52mm diameter speaker at
this location.
I liked a small campfire created for a Dungeons & Dragons type game by Tabletop WitchCRAFT,
and thought I'd share his video on how he creates his; to view it
click here.. It's low tech and might be a bit large for HO scale, but creative, so check it out.
2 and-a-Half D CAD Using PowerPoint
For a 3D printing Newbie, using 3D design software can be a bit intimidating, so let's simplify things and
start learning Computer Aided Design with software we may already know,
namely PowerPoint, and a technique I call 2 and-a-Half D CAD.
You will learn how to use advanced PowerPoint drawing tools like bezier curve manipulation and shape subtraction to create useful 2D shapes,
including board-and-batten siding, clapboard siding, corrugated roofing, windows, fences, railings, sign supports
and more. We will cover how to export PowerPoint pages as PDFs, and convert the PDFs into Stereo Lithography files for 3D printing using the ANYCONV.COM.
web site. Finally, we will cover just a few simple object manipulation tricks in TinkerCAD and CURA to manipulate simple objects into more complex ones.
Video "Trailer"
To view a short overview of this clinic, click here
Complete Clinic
To view the complete 46 minute clinic, click here
Handout
To view the Handout, click here. For some unknown reason the text on the first page may not
appear in some browsers. If this is your case, just click on the DOWNLOAD button on the right
and the complete two page document will display.
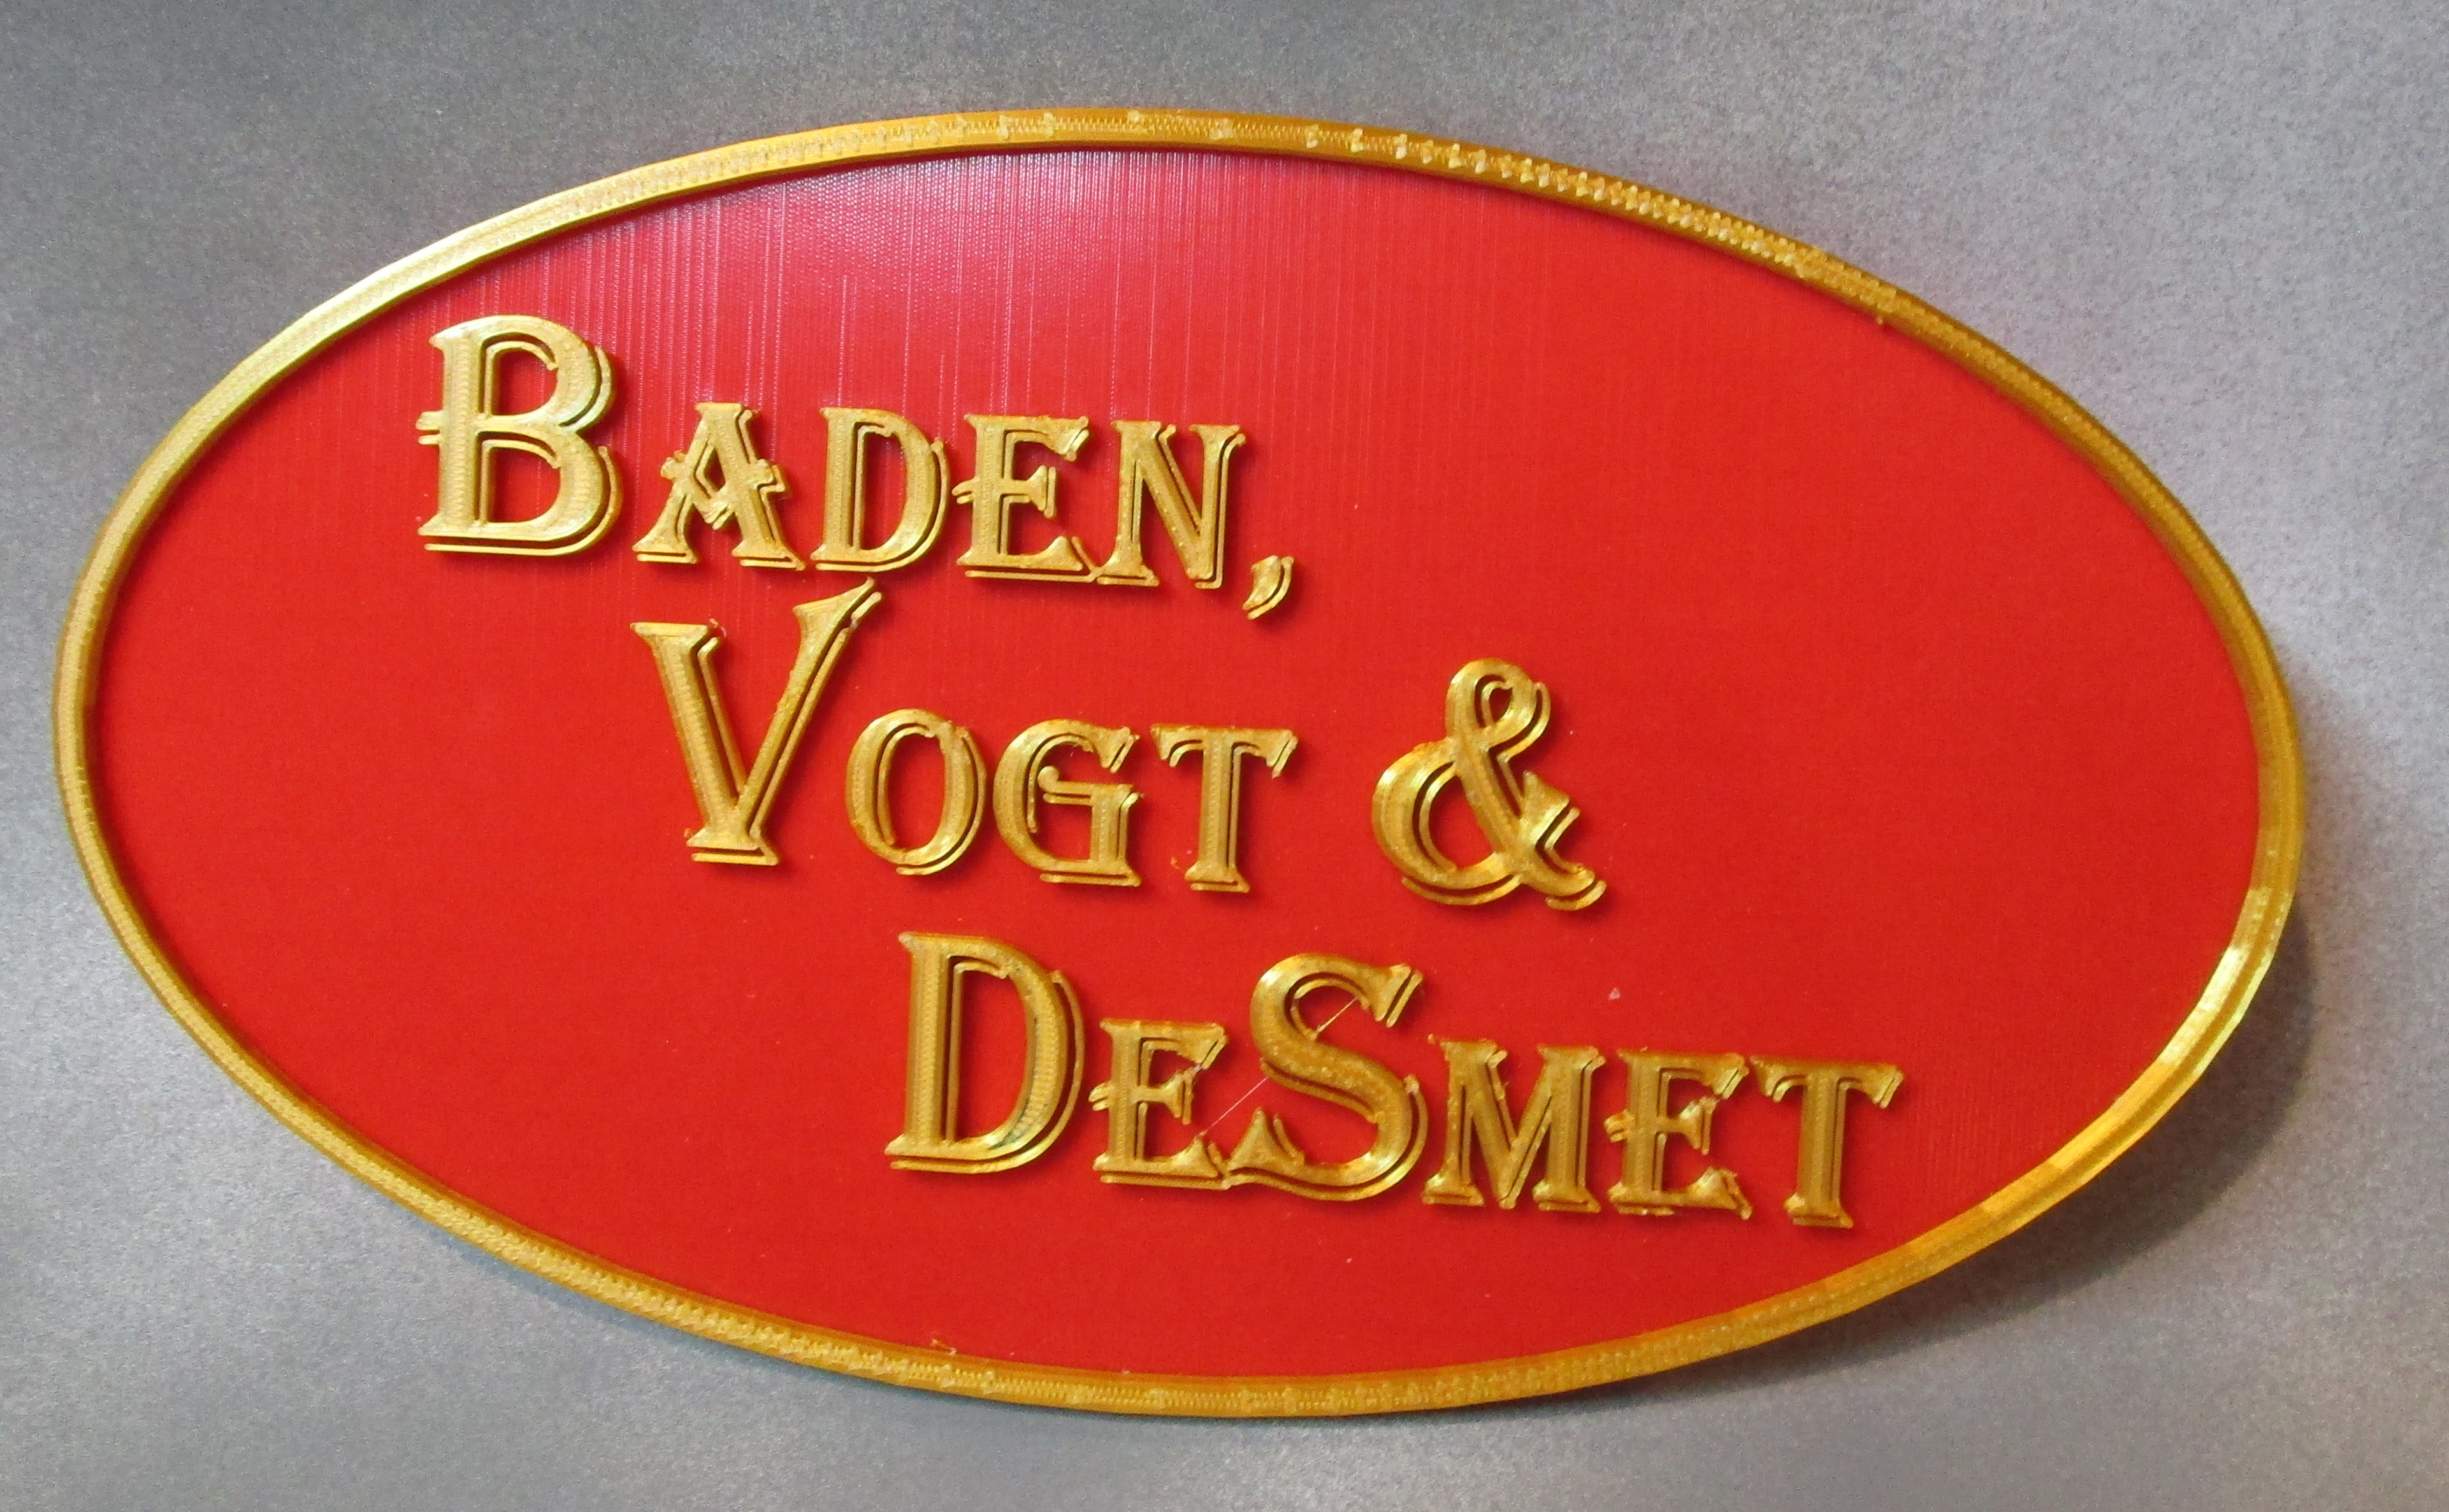
Downloadable Objects If you have seen my clinic on "Building Billboards for the Baden Vogt & DeSmet"
you learned how to create billboard support structures from styrene. You can also create the legs, boardwalk and frame
using the 2 and-a-Half D technique.
Here are links to 5 different PowerPoint files you can use to create framed billboards with artwork
8, 10, 12, 14 and 16 feet tall in HO scale (which means that the images you draw or download from the web
must be 1.10" 1.38", 1.65", 1.93" or 2.20" tall, respectively). It's up to you to
cut your own backer board from sheet styrene (such as Evergreen 9030 or 9040), to cut cut a strip of 8210 styrene as
the back support strip that connects the legs together, and to size the horizontal frame segments to suit your artwork.
Once you click on a size, click on the DOWNLOAD button to open the model in PowerPoint.
For 8' sign supports, click here
For 10' sign supports, click here
For 12' sign supports, click here
For 14' sign supports, click here
For 16' sign supports, click here
:
Below are links to walls and roofing drawn in PowerPoint and ready for saving as PDF files, conversion into Stereo Lithography files
and 3D printing. Save and modify as fits your needs.
For thick and thin board and batten wall and clapboard siding, click here
For corrugated roofing, click here
For scalloped roofing, click here
:
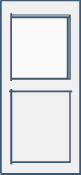
Here are links to some useful windows and doors.
For some basic windows and a simple door, click here
For a rustic door, click here
:
Finally, we have links to some miscellaneous objects we presented in the clinic.
For a Picket Fence, click here
For a Trestle Bent, click here
For a Picnic Pavilion, click here
For a Side Rail for a Highway Overpass, click here
For a Pedestrial guard rail, click here
For a interior room pods for the Newcastle house found on Thingiverse,
click here
For a pipe gate, click here
For design wedges, click here
Creating Custom Decals
Custom Decals are easy to make and transform your layout into a more distinctive
and memorable creation. We cover how to design decals using PowerPoint, Photoshop Elements, and GRAFFWRITER.COM, and
how to print them using decal paper and an ink-jet printer. Support structures for decals are also discussed.
Video "Trailer"
To view a short overview of this clinic, click here
Complete Clinic
To view the complete 38 minute clinic, click here
Handout
To view the Handout, click here
Clinic Survey To help improve future presentations, please take a
short survey of your thoughts on this clinic.
by clicking here.
Link to US Highway signs This is a Yahoo search for highway signs. I used one to trace when designing a Route 66
sign, but there are many for vintage and newer signs. To access the page
click here
PowerPoint text along a curve To view the instructions for drawing text along a curve in PowerPoint,
click here
Metallic Color CoordinatesIt is difficult to get RGB color coordinates for metalic colors that everyone agrees look good,
but here are some starting points.
Gold: (225,215,0) or (212,175,55) or (204,164,61)
Silver (192,192,192)
Copper (184,115,51)
3D Printing, Model Railroading, Stages of Love, and You
This clinic is an entry level clinic
covering what I have learned in the first few months of developing 3D models and printing them on my Ender 3 Pro
3D printer. I also cover how I downloaded models from other model railroaders. Transferring images from PowerPoint
and creating 3 dimensional Heralds will also be covered.
Video "Trailer"
To view a short overview of this clinic, click here
Complete Clinic
To view the complete 46 minute clinic, click here
Handout
To view the Handout, click here
Clinic Survey To help improve future presentations, please take a
short survey of your thoughts on this clinic.
by clicking here.
Troubleshooting Guide
This site from Simplify3D is an excellent guide for
help in troubleshooting many 3D printer problems.
Skirts, Brims and Rafts - What's the difference?
I generally don't use skirts, brims or rafts to hold my designs to my 3D printer build plate; I try
to place a large, flat surface on the bottom and keep the build plate clean and level.
But when I do need better surface adhesion, I generally use brims
.
Click on this link for a good explanation of the differences.
Good sites for 3D Models: In addition to Thingiverse.com which I really like for structures
(when you get there search for "HO Scale"), 3dwarehouse,sketchup.com which I like for pickup and commercial trucks
and TurboSquid.com
(all of which I mention in my clinic as good web sites to find 3D Models). I recently was impressed with Free3d.com; not all their
models are free, but they do have some nice cars and dinosaurs.
Sizing Motor Vehicles When I used to take a 3D model of a motor vehicle into a slicer and try to resize it for HO scale,
I never felt comfortable that I was getting the size right. What did I do? I measured my existing commercially purchased cars and trucks.
I found that a 53' trailer is 4.4" long (112mm), a mid-century sedan is 2.1" long (53mm) and a covered stake truck is 3.33" long (84mm).
The trailer and the stake truck are about 1.12" wide (28mm), the sedan 0.78" (20mm). A small delivery truck will be between
0.975" and 1.06" wide (25-27mm) and as long as that long sedan. More recent automobiles will be a bit shorter. Now when I import a .STL file into .
CURA, especially when importing from 3DWarehouse, the first thing I do is click on the object, and then click on the
resize tool on the left edge of the CURA window. I then specify the appropriate width of the vehicle, and I have a starting point.
I think widths are a better indicator than lengths. Now if I can just get the supports right!.
Free Models from Dave Ackmann: I occasionally publish my own simple 3D designs for Model Railroading to Thingiverse.com.
To download a city limits sign in HO click here
and to review related decals click here. then "View Raw".
To download a Route 66 Highway marker in HO click here
and to review related decals click here. then "View Raw".
To download a Street Sign for the Coral Court in HO click here
and to review related decals click here. then "View Raw".
Amazing Arduino Animations
This clinic was first presented in July, 2020 at the Gateway-X virtual convention of the NMRA,
It is organized into Chapters, and takes you from the basic concepts to procuring
components and simple programming of Arduino microprocessors. It then expands on different
components that can be added to Arduinos to provide sound, lighting and motion effects.
Each Chapter contains a PDF with detailed explanation of the topic, and may contain
one or more Arduino programs (or "sketches" as they are called in Arduino-speak), and
sometimes references to videos or other useful learning experiences.
The Projects build on the Chapters and show how to create vignettes of action
to bring life to your model railroad. Projects always include written instructions,
a video, and sketches that can be copied and used immediately, even if you have
no formal education in electronics or computer science.
All you need to do is click on a link below to open a topic of interest.
NOTE: some documents contain links to other web sites. When these documents
are viewed directly from this web site, these links will not work. HOWEVER, if
when you view the document you click on the "Download" button just above and to the right of the title,
and then view the document directly from your desktop, the links will work.
Video "Trailer"
To view a brief overview of this clinic, click here
Entire Clinic" - When I teach this clinic "live", I break it into two parts. The first 15
minutes describe what Arduinos are, and how to download and use the Interactive Development Environment. To view this first segment,
click here
Then, if you want to watch the second segment on how I create the projects,
click here.
Handout
To view this clinic's handout, click here
Clinic Survey To help improve future presentations, please take a
short survey of your thoughts on this clinic.
by clicking here.
Which Wire on a Wall Wart is the Hot Wire?
Need some help figuring it out? Click here
Chapter 1 - What is an Arduino and What Can You Do With Them in Model Railroading?
To view this chapter's documentation, click here
Chapter 2 - Getting Started
To view this chapter's documentation, click here
To view the Grade Crossing sketch, click here
To view the Grade Crossing sketch containing an error, click here
Chapter 3 - Arduino Components and Where You Find Them
To view this chapter's documentation, click here
Chapter 4 - Blinking a LED
To view this chapter's documentation, click here
To view a small program to test blinking a single LED, click here
To view a small program to test blinking a pair of LEDs, click here
Chapter 5 - Adding and External Power Supply and Why I Use Barrier Strips
To view this chapter's documentation click here
Chapter 6 - LEDs and Pulse Width Modulation
To view this chapter's documentation, click here
Chapter 7 - Why an Arduino Nano instead of an Uno
To view this chapter's documentation, click here
Chapter 8 - Using a Toggle or Push Button Switch
To view this chapter's documentation, click here
To view a small program to test a switch, click here
Chapter 9 - Adding Audio to an Arduino
To view this chapter's documentation, click here
To hear "I've Been Working on the Railroad", click here.
If this web site tells you that
the file is too large to play, just click on the "download" button
above the message and to its right, and it will download to your PC and begin to play.
Once playing, you may save the audio file to your hard drive by
right clicking on the status bar and then on "Save Audio As" and specifying a file name.
To view a small program to play an audio file, click here
Chapter 10 - Using a Light Dependent Resistor
To view this chapter's documentation, click here
Chapter 11 - Adding an Alphanumeric Display
To view this chapter's documentation, click here
To view the SCANNER program code, click here
To view a small program to test an alphanumeric display, click here
Chapter 12 - Adding Motors - Steppers and Servos
To view this chapter's documentation, click here
Chapter 13 - Adding a Relay
To view this chapter's documentation, click here
Project 1 - Blinking LEDs and Fires
To view this project's video trailer, click here
To view this project's documentation, click here
To view this project's Tow Truck Arduino code, click here
To view this project's Police Car Arduino code, click here
To view this project's Tow Truck and Police Car Arduino code, click here
To view this project's Dumpster Arduino code, click here
To view this project's Police Car and Tow Truck and Dumpster Arduino code, click here
Project 2 - Speedometer
Version 0.55 as of October 31, 2020, fixes the bug which occasionally caused version 0.54 and earier of the Speedometer to
work improperly when a locomotive was pulling cars, and the space between cars was at "harmonic" speeds.
To view this project's video trailer, click here
To view this project's documentation, click here
To view this project's Arduino code, click here
Project 3 - Randomized LEDs
To view this project's video trailer, click here
To view this project's documentation, click here
To hear the Waterfall project's audio, click here
If this web site tells you that
the file is too large to play, just click on the "download" button
above the message and to its right, and it will download to your PC and begin to play.
Once playing, you may save the audio file to your hard drive by
right clicking on the status bar and then on "Save Audio As" and specifying a file name.
To view the Building's project Arduino code, click here
To view the Waterfall's project Arduino code, click here
Project 4 - Lumberjack
To view this project's video trailer, click here
To view this project's documentation, click here
To view this project's Arduino code, click here
To hear Lumberjack's Ax hitting the tree ("Single_Chop.MP3"), click here.
If this web site tells you that
the file is too large to play, just click on the "download" button
above the message and to its right, and it will download to your PC and begin to play.
Once playing, you may save the audio file to your hard drive by
right clicking on the status bar and then on "Save Audio As" and specifying a file name.
To hear falling tree ("Falling_Tree.MP3"), click here.
If this web site tells you that
the file is too large to play, just click on the "download" button
above the message and to its right, and it will download to your PC and begin to play.
Once playing, you may save the audio file to your hard drive by
right clicking on the status bar and then on "Save Audio As" and specifying a file name.
Project 5 - Carousel
To view this project's video trailer, click here
To view this project click here
To view this project's Arduino code, click here
To download Souza marches, click here
:
:
Building Billboards
This clinic was first presented at the Gateway Division of the NMRA in July, 2019, and subsequently at
Trainfest 2019, Gateway-x 2020, and later presented virtually at several NMRA Division meetings.
It instructs the viewer on how to make custom billboards, as implemented on the Baden,
Vogt & DeSmet HO scale model railroad. The clinic describes where to get billboard images and how to build the support structures.
It recommends standardizing billboard heights, and descibes how to make assembly fixtures out of
Ultra High Molecular Weight Polyethylene and a router table.
Each part is a video, ranging from 3 minutes to 18 minutes. I hope you find them useful and enjoyable.
Video "Trailer"
To view a brief overview of this clinic, click here
.
Handout
To view this clinic's handout, click here
.
Spreadsheet
To view the spreadsheet which calculates the dimensions of Billboard legs, click here
Clinic Survey To help improve future presentations, please take a
short survey of your thoughts on this clinic.
Click here.
Complete Presentation
(44:15) To view this video,
click here
Building Billboard Assembly Fixtures (16:28)
For a more detailed video on building assembly fixtures from Ultra Hight Molecular Weight Polyethylene,
click here
Other Stuff Of Interest
Gateway Division AP Electrical Engineering Working Group:
In November, 2021, I became the AP Chairman for the Gateway Division of the NMRA (St Louis and surrounding area).
I am personally interested in the Electrical Engineering Certificate, and challenged our attendees to join me,
with the goal of submitting our SOQ (Statement Of Qualification) by the end of June, 2022. To that goal,
I have created a web page with a simplified perspective of the requirements and helpful ideas for achieving our goal.
If you are interested in viewing this page.
click here.
I think the single most valuable thing you can do to achieve this certificate is to ignore the requirements on
the NMRA web site and focus on the SOQ, particularly the first three sections. Decide which options you
want to pursue, complete the engineering and document your work. Because of COVID-19, we may need to find
ways to verify the work, and I am working with the Region on how to do so, Creating the engineering drawings required
in sections 4 and 5 will also be a learning experience, but I think my group is up to it, Interested? Drop me
and email with the link at the top of the page.
Below are clinics I am considering developing.
If any of these topics interest you, let me know by
clicking here
More Amazing Arduino Animations - A Clinic for Model Railroaders
Dave Ackmann
Gateway Division, NMRA
A sequel to "Amazing Arduino Animations", this clinic will present more animations for model railroading, many of which
utilize the control and synchronization features of Arduino Microprocessors. This clinic has an anticipated release date of Summer of 2022.
.
Skin and Bones: Creating Custom 3D Figures - A Clinic for Model Railroaders
Dave Ackmann
Gateway Division, NMRA
I have discovered software that lets me
design and 3D print model railroad figures that are posed in positions not available commercially.
The figures are designed on a computer and the programs are far from simple, but
where there is a strong enough will, this is a way.
.
3D Printing a Model Railroad Herald - A Sample Technique for Model Railroaders
Dave Ackmann
Gateway Division, NMRA
This potential clinic would show how I create two-colored freelance model railroad heralds on a simple
3D printer (Ender 3 Pro) to decorate my layout room.
I use TinkerCAD to draw the underlaying "field", and then superimpose a rim, images and text transferred from PowerPoint.
I use CURA for a slicer, and before printing I add a line to the CURA preferences to allow for printing in separate layers and colors.
It's fun, and not that hard.
 .
.
Starting in November, 2021, I began investigating using CAD programs for layout design. I remembered that ATLAS had track planning
software and quickly learned that ATLAS was basically reselling a package called SCARM. Since they were the same price, I visited the
SCARM site at https://www.scarm.info/index.php and downloaded the free version. It's a neat little tool. I
also visited the YouTube site for "DIY and DIGITAL RR" (click here)
for a nice tutorial on using SCARM
(click here for tutorial).
I don't envision creating a clinic on the topic, but if you are interested in getting started in CAD for layout design, give
SCARM and Jimmy's clinic a try. The free version has a limit on the number of components you can include in your design, but if you buy
the $39.99 version of the software, the limit is removed. Additionally, I downloaded the "Model Train Simulator" (MTS) which allows me to
run virtual trains on my PC screen.
I liked running the Model Train Simulator, and just for grins I created John Allen's "Timesaver" layout in SCARM and downloaded it to my web site.
If you download the trial versions of SCARM and MTS, you can
click here
to download my implementation. When you open SCARM, do a FILE/OPEN on my Timesaver. Then click on the TRAIN CONTROLLER in the upper right, turn on the
Power, set the direction of the red locomotive and bump the throttle. See how many moves it takes to be eastbound on the track on the upper right
with all cars on tow!
Subsequently I decided another piece of software might be better for me, and eventually chose ANYRAIL at
http://www.anyrail.com, as I felt it handled flex track better. I liked Ron Marsh's
tutorials on YouTube. I ponied up $59.99 for the
complete version, which allows me to have more than 50 objects in the design.
08:31 CDT 21 July 2026